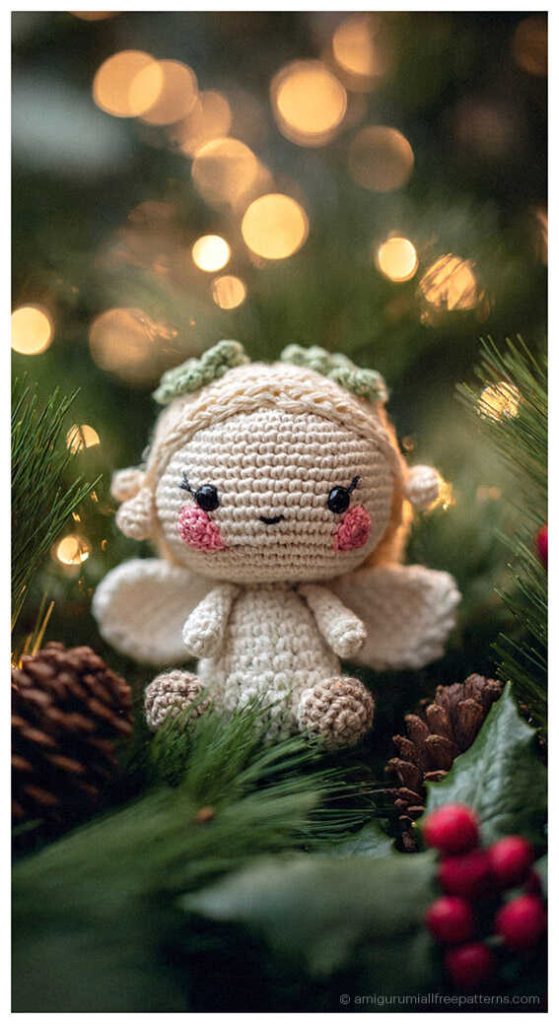
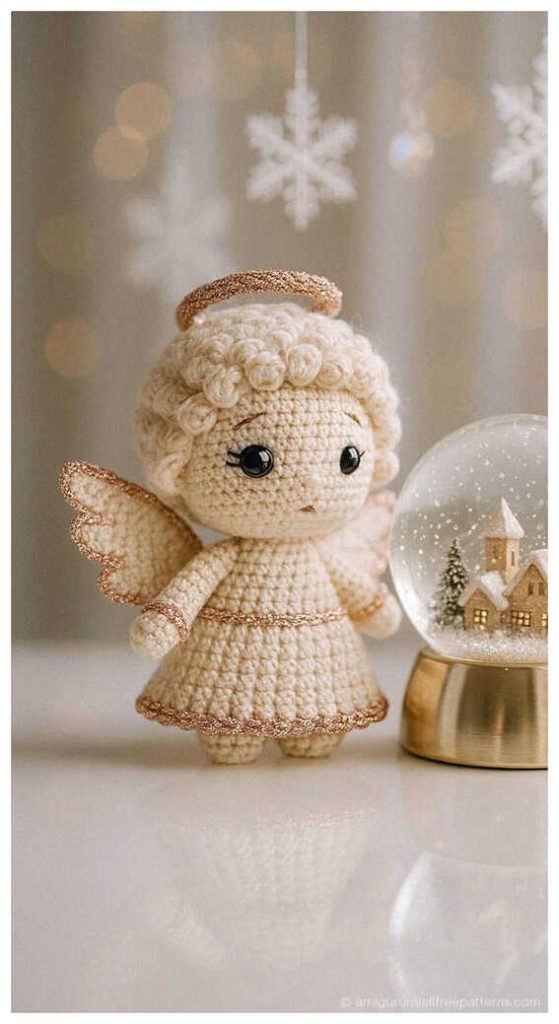
Christmas Angel Amigurumi – Free Crochet Pattern Tutorial
Designer: Little Yarn Potato
Instagram: @littleyarnpotato
Calling all crochet lovers — today’s pattern is extra adorable…
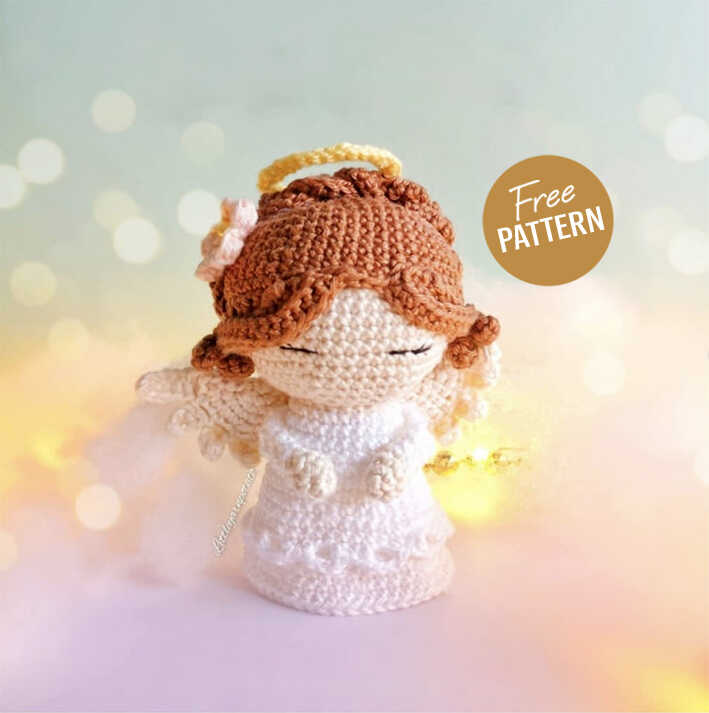
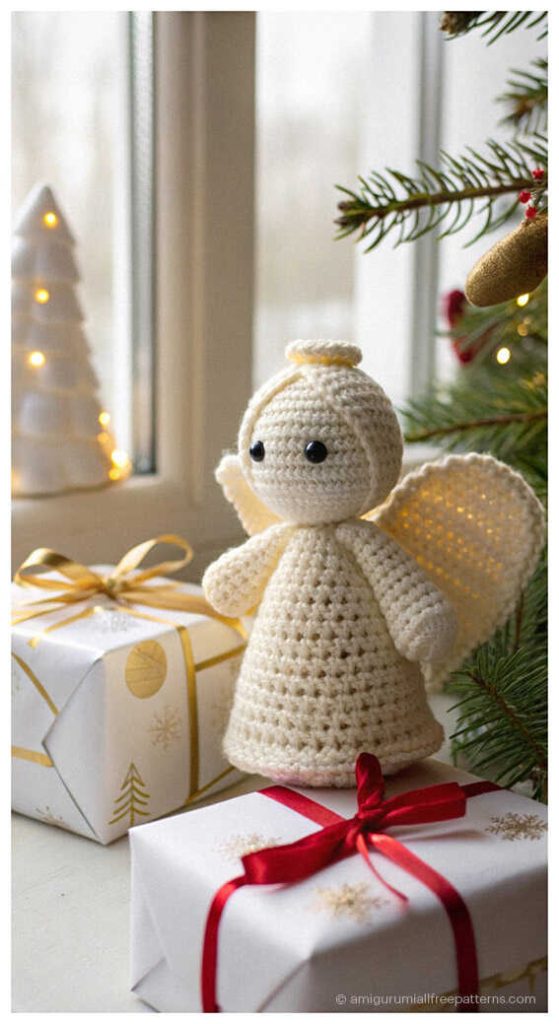
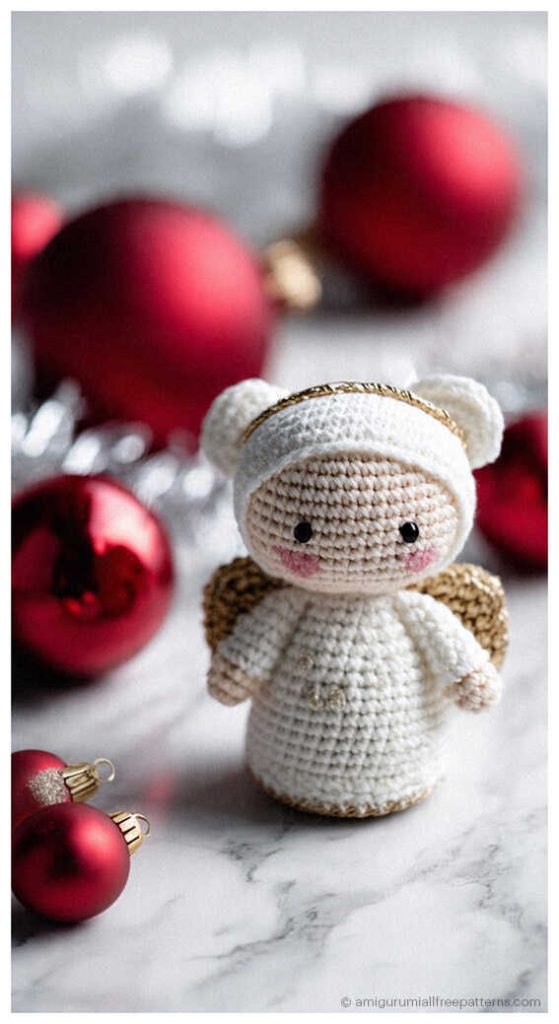
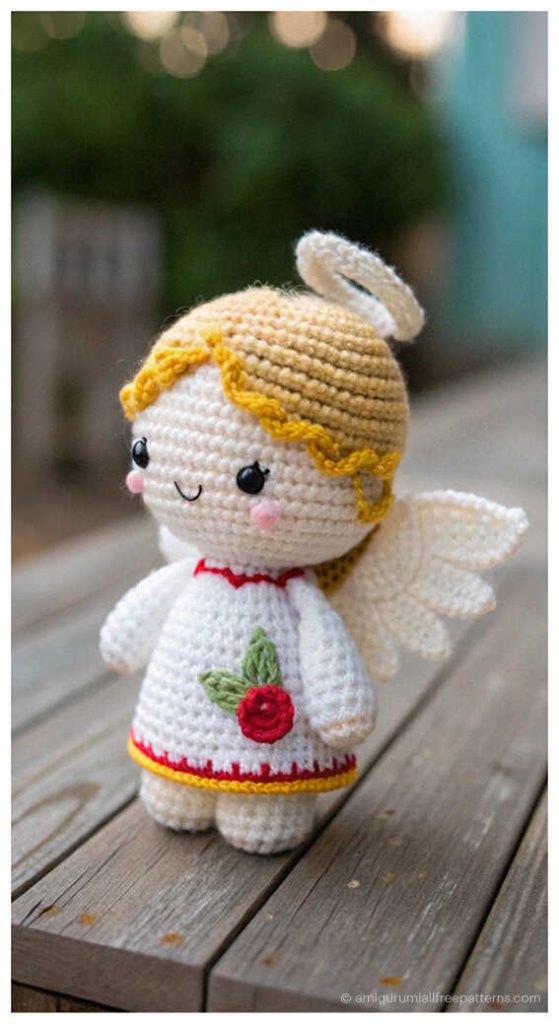
Christmas Angel Amigurumi – Free Crochet Pattern is a charming, step by step, beginner friendly project designed by Little Yarn Potato, perfect for adding a handmade touch to your holiday decor or gifting. Using 4 ply 100% cotton yarn such as Scheepjes Catona in brown, white, off-white, yellow, and pink, along with a 2.20 mm crochet hook (or a hook appropriate for your yarn), you will create a delicate angel approximately 10 cm tall when using similar materials. The pattern also calls for black embroidery thread, stuffing, scissors, a sewing needle and pins, and stitch markers. At the end of the pattern, you will find wonderful amigurumi Christmas Angel ideas to inspire festive variations and finishing touches. Thank you to Little Yarn Potato for sharing this lovely design.
This free crochet pattern is easy to follow and thoughtfully explained, making it ideal for crocheters who enjoy clear guidance and neat results. For those who would like a more detailed explanation or extra guidance, be sure to visit the designer’s Instagram link, where additional tips and inspiration are shared.
Abbreviations
MR– magic ring
Sc– single crochet
Hdc– half double crochet
Dc– double crochet
Tr– treble crochet
Inc– increase
Dec– decreas
Ch– chain
BLO– back loop only
FLO-Front loop only
St(s)– stitch(es)
Slst– slip stitch
(..)– indicates the number on stitches you should have at the end of each round
(..) x n – repeat instructions in brackets n times
Materials
• 4 ply 100% cotton yarn (I used Scheepjes Catona yarn)- or any yarn of your choice in the following colours: brown, white, off- white, yellow, pink
• 2,20 mm crochet hook (or hook yhat is apprepriate for the yarn you’re using)
• Black embroidery thread
• Stuffing
• Scissors
• Sewing needle and pins
• Stitch markers
ANGEL AMIGURUMI FOR CHRISTMAS – FREE CROCHET PATTERN
Head
Yarn; off-white
Rnd 1. 6sc in MR (6)
Rnd 2. inc x 6 (12)
Rnd 3. (inc, sc) x 6 (18)
Rnd 4. (inc, 2sc) x 6 (24)
Rnd 5. (inc, 3sc) x 6 (30)
Rnd 6. (inc, 4sc) x 6 (36)
Rnd 7. (inc, 5sc) x 6 (42)
Rnd 8. 42sc (42)
Rnd 9. (inc, 6sc) x 6 (48)
Rnd 10-15. 48sc – 6 rnds (48)
Rnd 16. (dec, 6sc) x 6 (42)
Rnd 17. 42sc (42)
Rnd 18. (dec, 5sc) x 6 (36)
Rnd 19. (dec, 4sc) x 6 (30) Begin to stuff head
Rnd 20. (dec, 3sc) x 6 (24)
Rnd 21. BLO- (dec, 2sc) x 6 (18)
Rnd 22. (dec, sc) x 6 (12)
Rnd 23. (dec) x 6 (6)
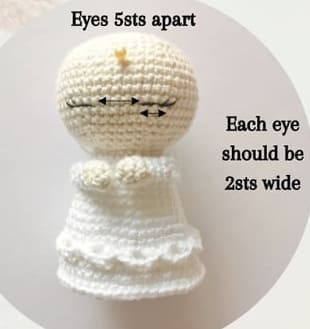
Finish stuffing head. Fasten off and cut the yarn, leaving a yarn tail to weave the yarn, leaving a yarn tail to weave through the FLO of the last round. Pull tight to close the hole and weave the yarn tail in. You can now embroider
the eyes, between Rnd 14-15 of the head, 2sts wide, and 5sts apart. Embroider 2 eyelashes for each eye.
Body & Dress
Start with off-white yarn
Rnd 1. Turn head upside down and pull up a loop in the remaining FLO from rnd 20 and ch 1. Starting in same st as the ch 1, 24sc.
Change to white yarn
Rnd 2. (inc, 3sc) x 6 (30)
Rnd 3-6. 30sc -4 rnds (30)
Rnd 7. (inc, 4sc) x 6 (36)
Rnd 8. 36sc (36)
Rnd 9. (inc, 5sc) (42)
Rnd 10-11. 42sc -2 rnds (42)
Rnd 12. BLO 42sc (42)
Rnd 13-14. 42sc – 2 rnds (42)
Rnd 15. (inc, 6sc) x 6 (48)
Rnd 16. 48sc
Fasten off and sew in the yarn tail.
Angel Dress Ruffle
Yarn; white
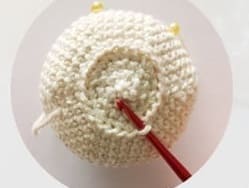
Turn Angel upside down, insert hook in the of the FLO from Rnd 11. Pull up a loop and ch 1. Work the first st of the ruffle (i.e the dc) in this st.
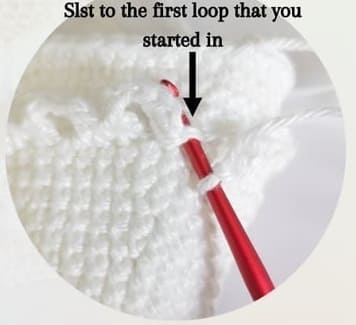
Ruffle: (dc in the st, ch3, skip 1 st, dc in next st, slst in next st) x 10, then dc in next st, ch3, skip 1 st and slst into the first loop.
Arms (x2)
Start in off-white yarn
Rnd 1. 5sc in MR (5)
Rnd 2. (inc, 1sc) x 2, inc (8)
Rnd 3. 8sc (8)
Change to white yarn
Rnd 4. (dec, sc) x 2, dec (5)
Rnd 5-6. 5sc – 2rnds (5)
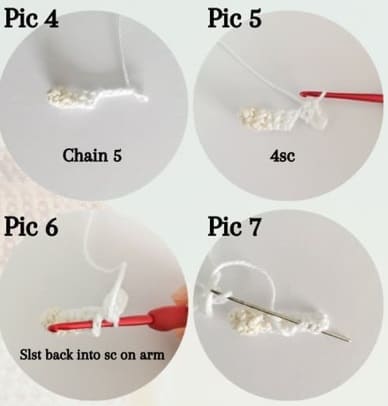
Do not stuff the arm. Fold the arm in half and 2sc through both layers of the opening to close, then without cutting the yarn. ch5 and from second ch on hook, 4sc and then slst back onto the next sc on the arm. Leave a yarn tail to sew. Weave in the yarn tail to the end of the arm for sewing.
Halo
Yarn; yellow
Ch 36. Slst to first st to join the round and then slst 35 all the way around.
Fasten off and cut the yarn. Invisible close off.
Flower
Start in yellow yarn
5sc in MR
change to pink yarn. Starting in the first st: (dc, tr, dc and slst all in the same st), repeat in the remaining 4 stitches (you should have five petals). Slst into first stitch to finish. Fasten off and cut the yarn. Weave in the yarn tail.
Angel Wings
Left wing
Yarn; off- white
Rnd 1. 6sc in MR (6)
Rnd 2. inc x 6 (12)
Rnd 3. (inc, sc) x 6 (18)
Rnd 4. (inc, 2sc) x 6 (24)
Rnd 5. (inc, 3sc) x 6 (30)
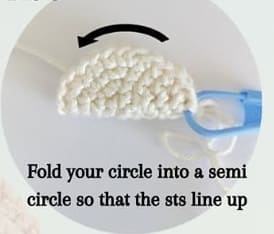
Fold circle in half, so that the stitches line up.
We will now make each of the individual 7 feathers (F1-F7)
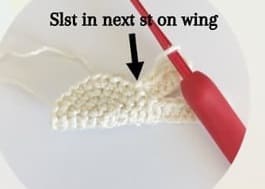
Note: When it says “slst into next st” ensure that you slst through both layers of the wing.
F 1. ch6, from 2nd st on hook, 2sc, 2hdc, 1dc, skip 1 st on the wing, slst into next st.
F 2-3. (ch5, from 2nd st on hook, 2sc, 2 hdc, skip 1 st on the wing, slst into next st)
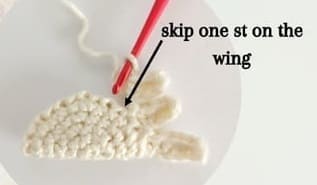
F 4. ch4, from 2nd st on hook, 3hdc, skip 1 st on the wing, slst into next st.
F 5-6. (ch3, from 2nd st on hook, 2hdc, skip 1 st on the wing, slst into next st)
F 7. ch2, from 2nd st on hook, hdc, skip 1 st on the wing, slst into next st.
Fasten off. Leave a long yarn tail for sewing.
Right wing
Yarn; off-white
Make Rnd 1-5 the same for the left wing. Fold the circle in half, so that the stitches line up.
We will now make each of the individual 7 feathers (F 1- F 7).
Note: When it says “slst into next st” ensure that you slst through both layers of the wing.
F 1. 1sc through both layer first then: ch2, from 2nd st on hook, hdc, skip 1 st on the wing, slst into next st.
F 2-3. (ch3, from 2nd st on hook, 2hdc, skip 1 st on the wing, slst into next st)
F 4. ch4, from 2nd st on hook, 3hdc, skip 1 st on the wing, slst into next st.
F 5-6. (ch5, from 2nd st on hook, 2sc, 2hdc, skip 1 st on the wing, slst into next st)
F 7. ch6, from 2nd st on hook, 2sc, 2hdc, 1dc, skip 1 st on the wing, slst into last st.
Fasten off. Leave a long yarn tail for sewing.
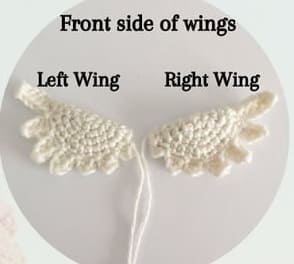
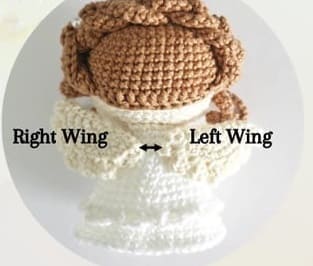
Sew the wings to the back of the body 1 st apart. Refer to picture for how the wings should look
Hair
Yarn; Brown
Rnd 1. 6sc in MR (6)
Rnd 2. inc x 6 (12)
Rnd 3. (inc, sc) x 6 (18)
Rnd 4. (inc, 2sc) x 6 (24)
Rnd 5. (inc, 3sc) x 6 (30)
Rnd 6. (inc, 4sc) x 6 (36)
Rnd 7. (inc, 5sc) x 6 (42)
Rnd 8. (inc, 6sc) x 6 (48)
Rnd 9-13. 48sc – 5rnds (48)
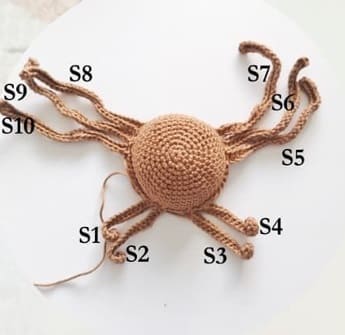
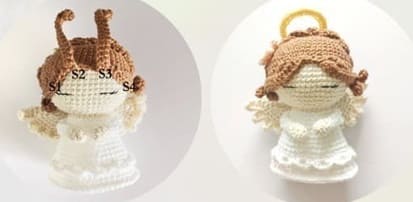
Rnd 14. sc in first st, then we will now work on the hair strands (S 1- S 8) for the angel:
S 1-2. (ch20, from second ch on hook 19sc, skip 1 sc on the hair, slst in next st), sc in next 2st
S 3-4. (ch20, from second ch on hook 19sc, skip 1 sc, slst in next st), sc, 3hdc, 2dc, slst in next st.
S 5-7. (ch30, from second ch on hook 29hdc, skip 1 sc, slst in next st), 11dc, slst in next st.
S 8-10. (ch30 from second ch on hook 29hdc, skip 1sc, slst in next st), 2dc, 3hdc, sc, slst.
Fasten off and leave a long yarn tail to sew hair to the head.
How to arrange the hair:
Plait S 5-7 to make the right braid and plait S 8-10 to make the left braid. Place the left braid and the right braid over the top of the hair, with the right braid in front of the left braid. Glue the braids or sew the braids in place to secure.
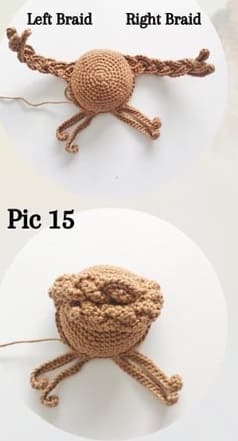
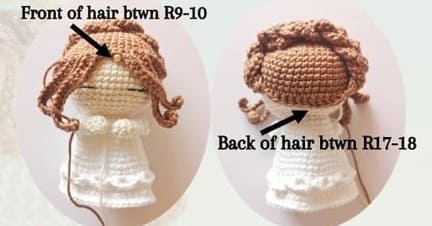
Pin the hair onto the head, with the front part of the hair falling between Rnd 9-10 of the head and the back part of hair falling between Rnd 17-18 of the head.
Sew/ glue S1 and S4 to the left and right side of the head, respectively.
Sew/ glue S2 over the top of S1 and
Sew/ glue S3 over the top of S4
Assembly
Arms: Sew the arms to the sides of the body. The arms should face forward. The top of the arm should fall around Rnd 3. The bottom of the arm should fall around Rnd 5.
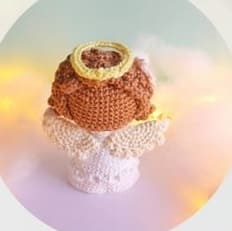
Halo: Secure the halo on the hair with a couple of stitches onto the back braid.
Flower: Pin or sew flower at the left side of the front braid.
Congratulations, you have completed the amigurumi angel pattern.
You may also like Amigurumi Little Santa Claus Free Crochet Pattern
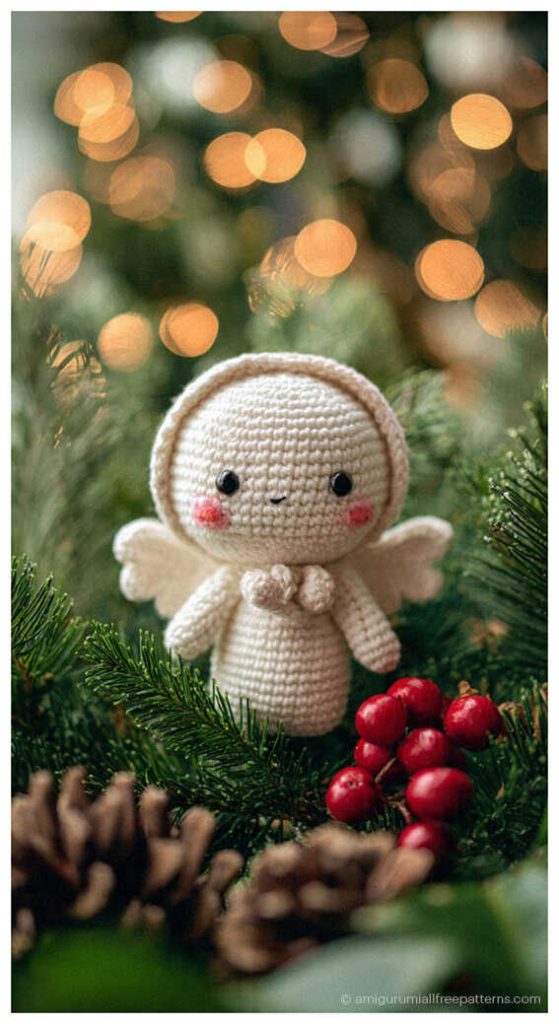
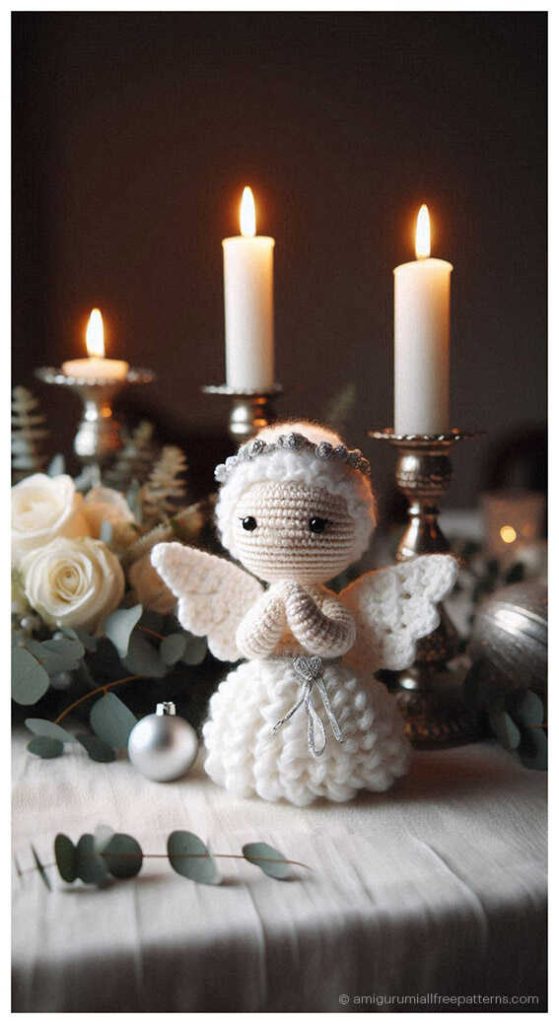
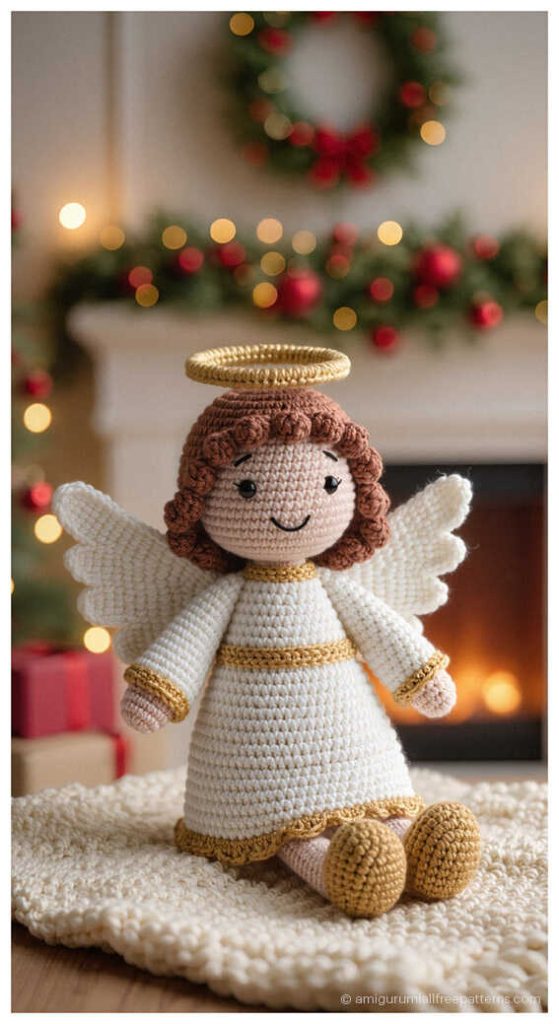
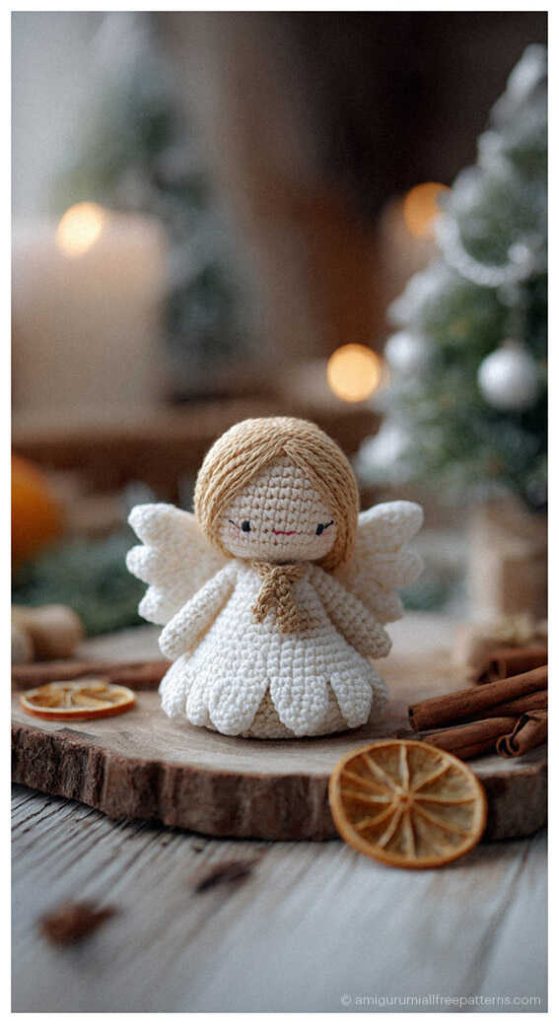
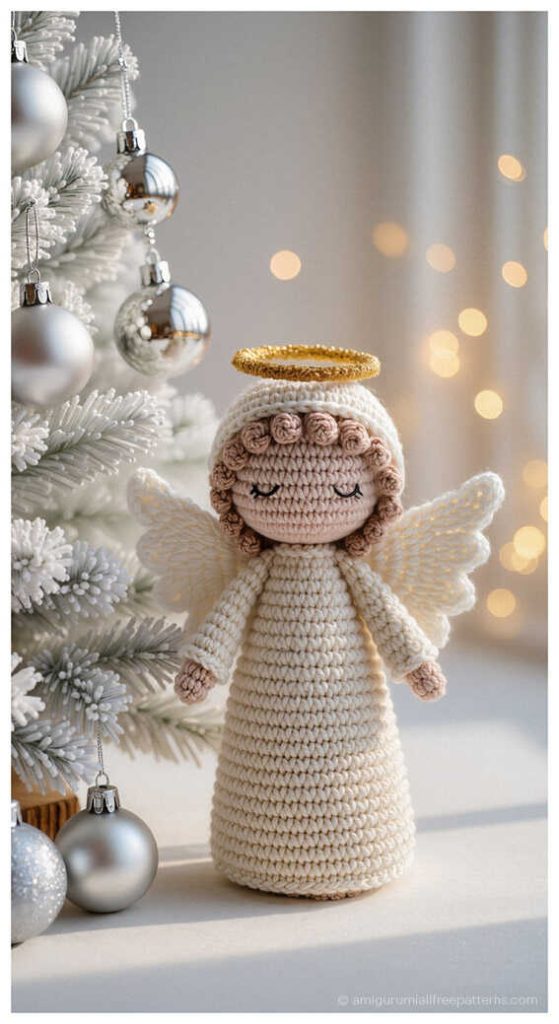
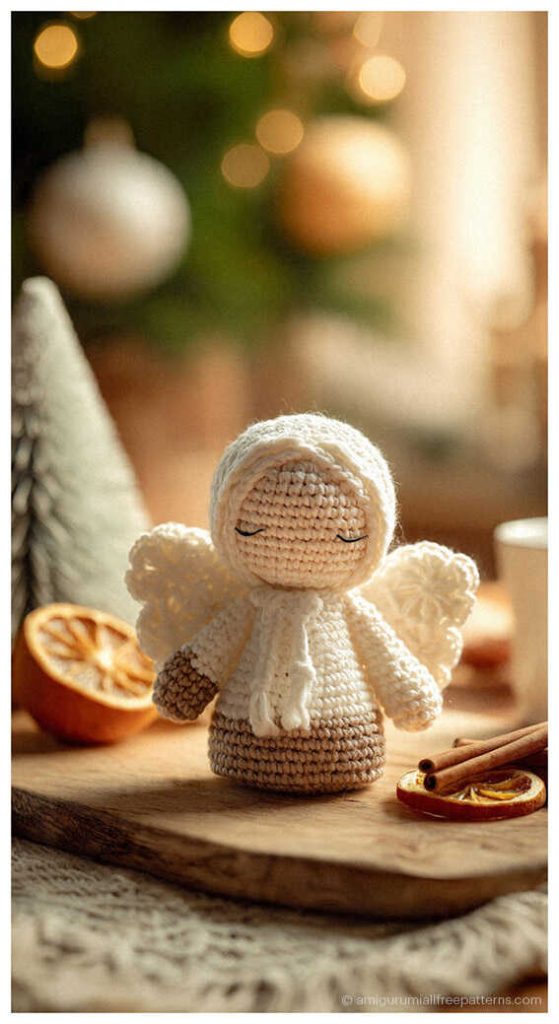
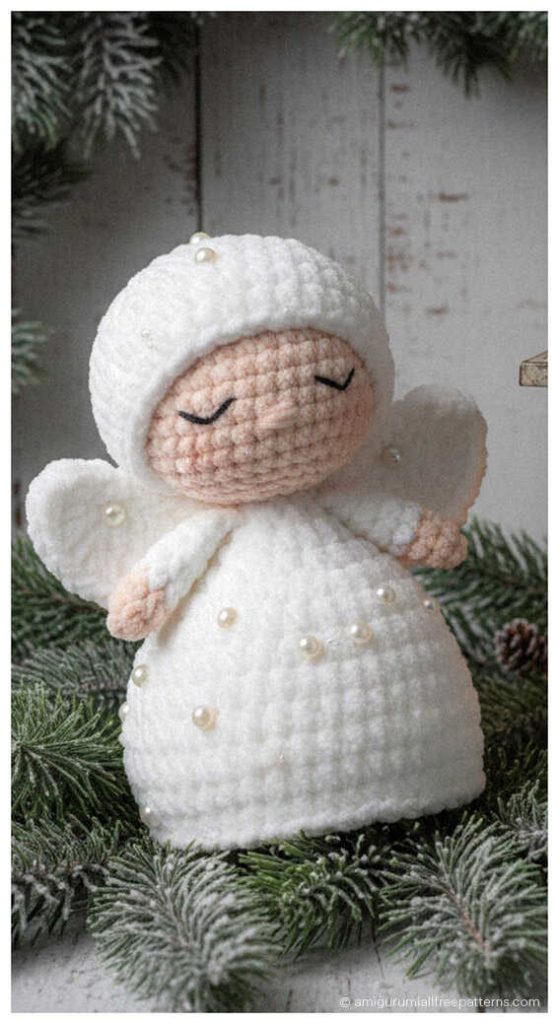
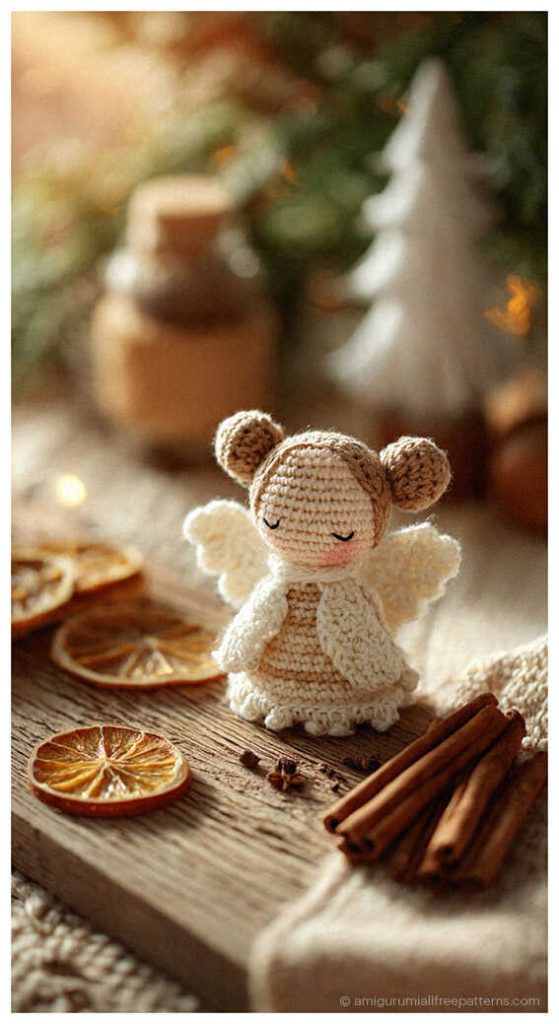
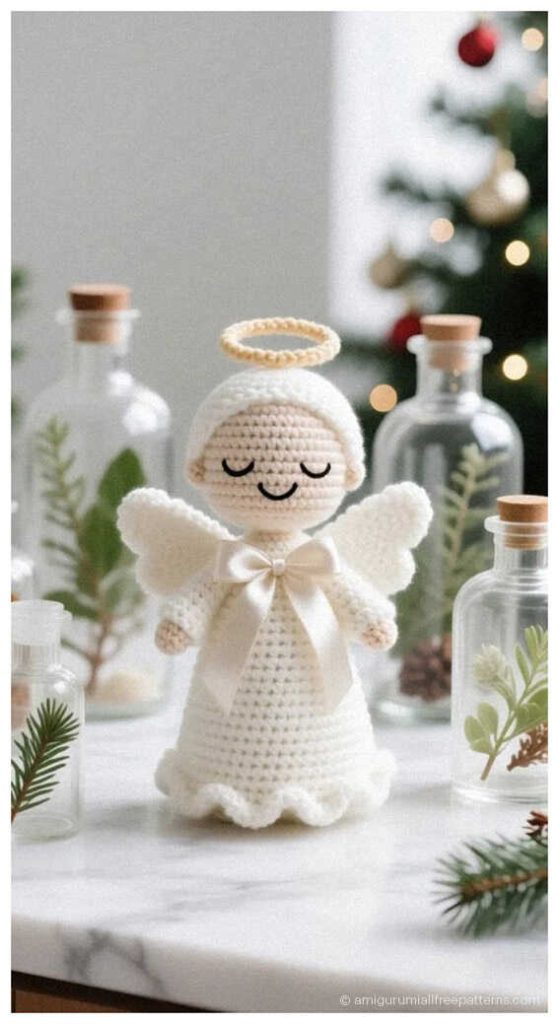
Favorite amigurumi Angel ideas:


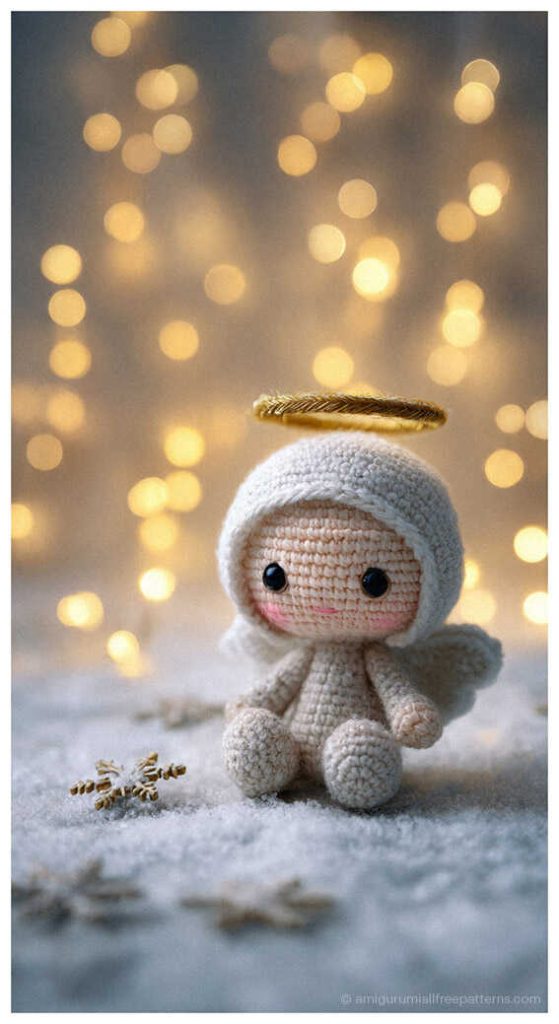
Ready to create your next adorable amigurumi companion?
Explore our collection of free patterns featuring amigurumi cats, amigurumi dolls, amigurumi dogs, amigurumi unicorns, amigurumi birds, amigurumi giraffes, amigurumi dinosaurs, amigurumi penguins, amigurumi bunnys, amigurumi bears, and countless other charming creatures. From simple projects perfect for beginners to intricate designs for experienced crocheters, we’ve got patterns for every skill level.
Join our amigurumi community (Instagram, Facebook, YouTube), unleash your creativity, and bring your favorite crochet characters to life. Follow us for fresh inspiration and new patterns that will keep your hooks busy!
Keywords: free amigurumi patterns, crochet toys, amigurumi animals, beginner amigurumi, amigurumi dolls, crochet free patterns, crochet patterns, easy crochet