Crochet Mouse Free Amigurumi Pattern
Designer: Like A Liger Crochet
Instagram: @likealigercrochet
Etsy Shop: LikeALigerCrochet
Hello Amigurumi Lovers…
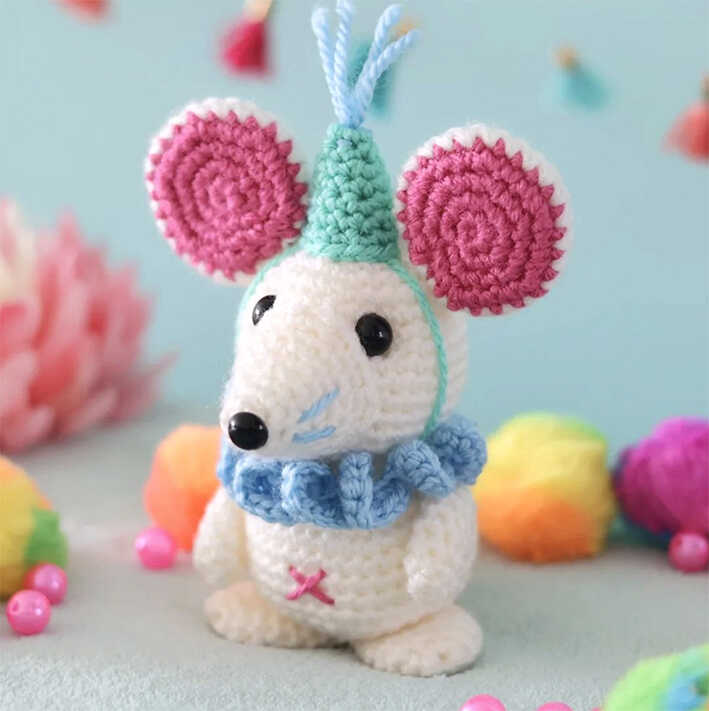
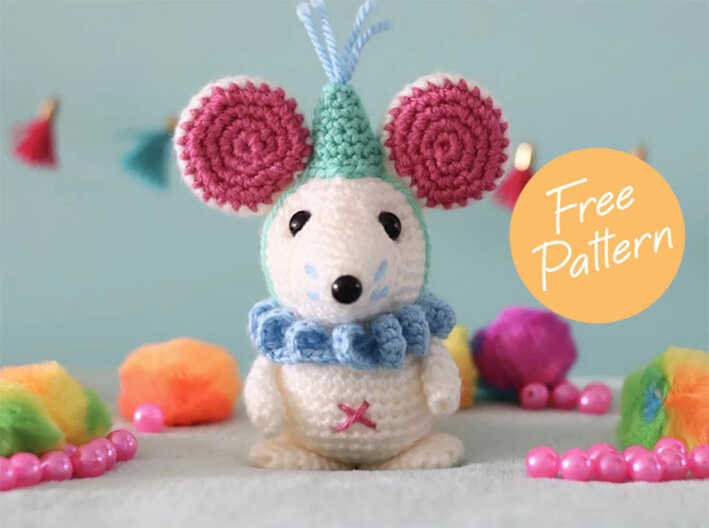
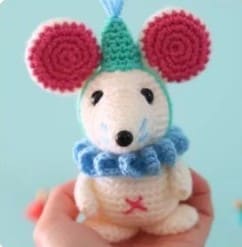
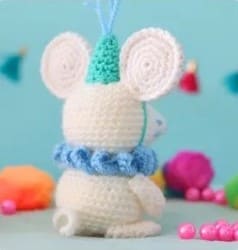
One of the free amigurumi crochet patterns we will share today is the birthday party mouse, whose photos and design belong to Like A Liger Crochet. You can learn how to crochet this mouse using the free amigurumi pattern. Thanks to Like A Liger Crochet for this cute mouse.
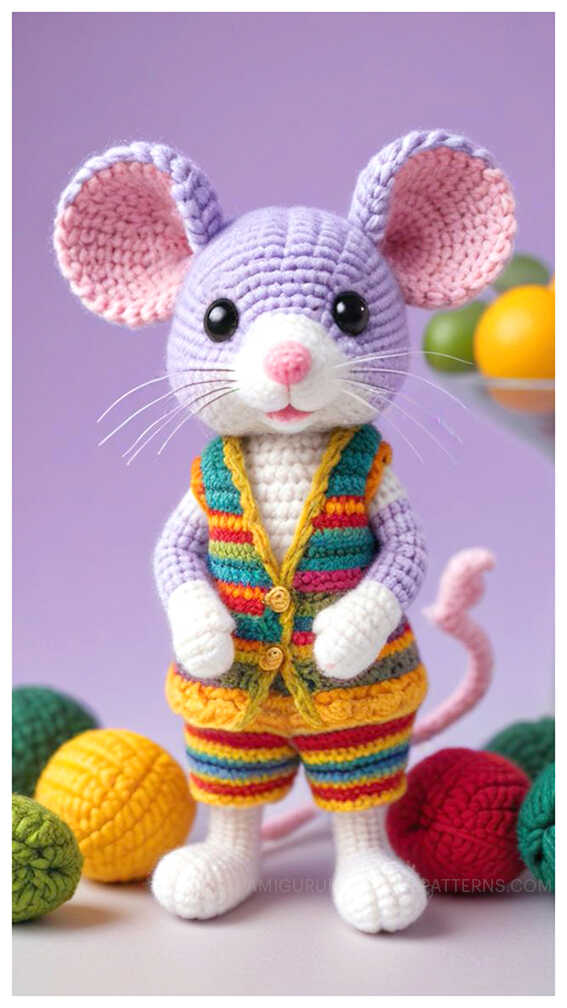
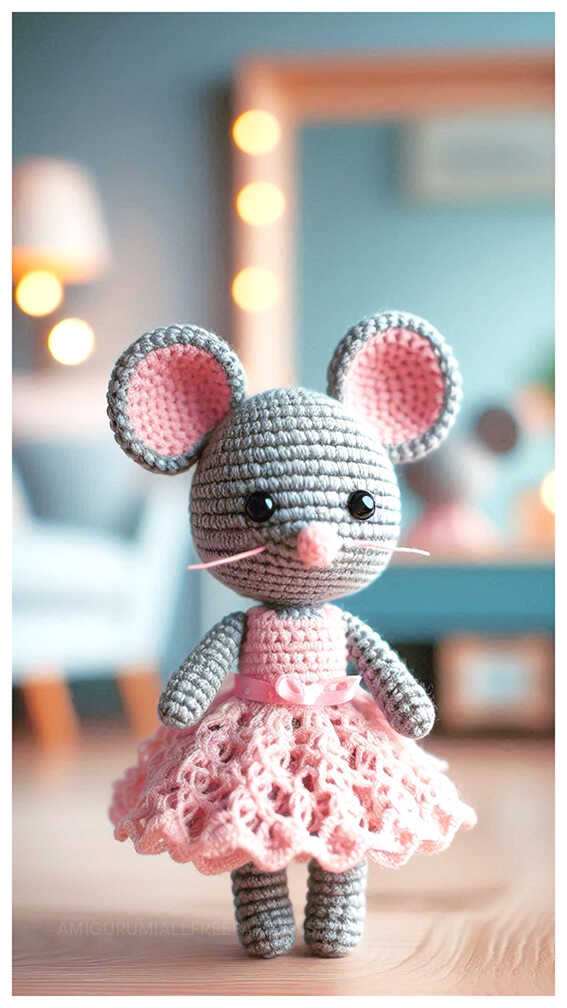
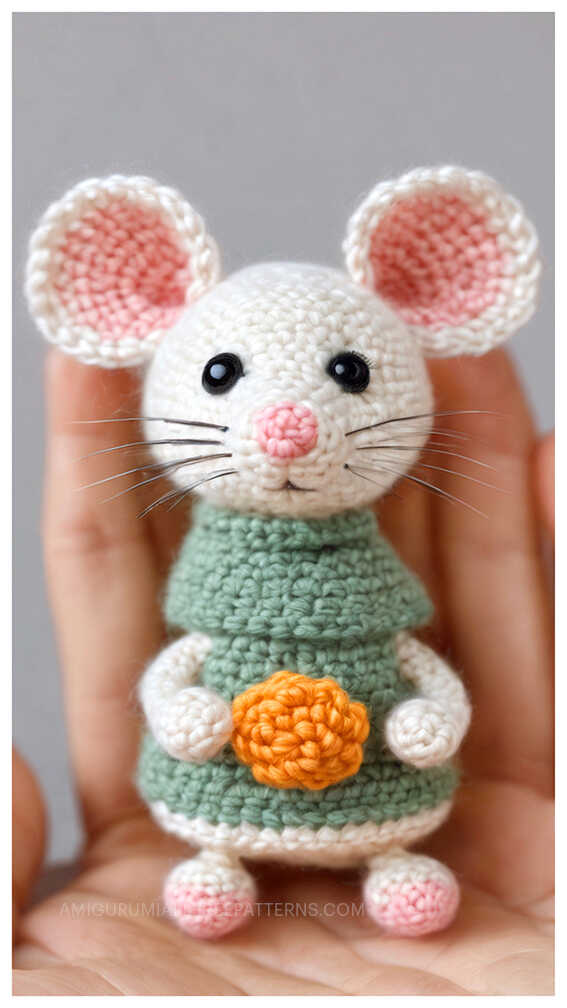
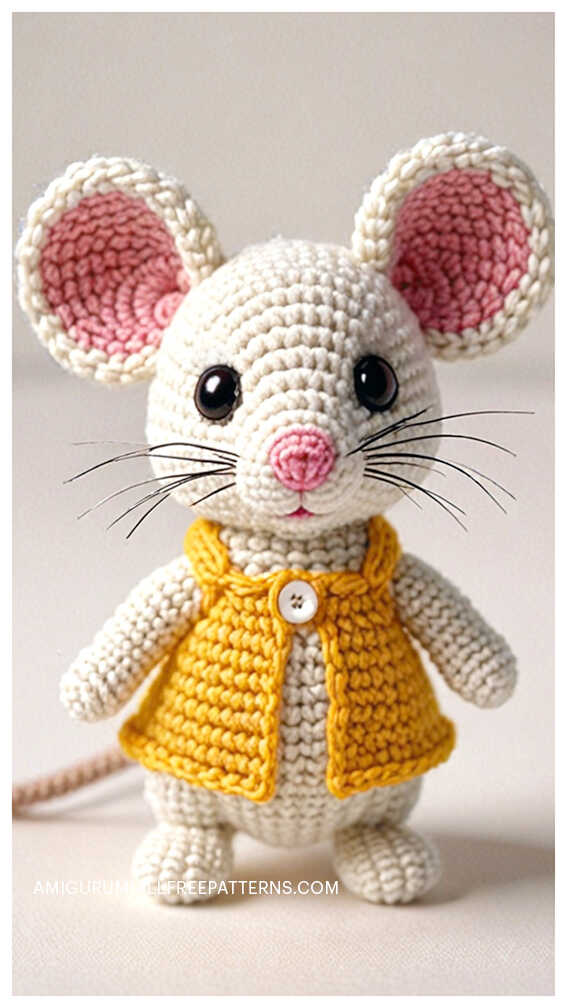
Amigurumi cats, amigurumi dolls, amigurumi dogs, amigurumi unicorns, amigurumi lambs, amigurumi dinosaurs, amigurumi foxes, amigurumi bears, amigurumi giraffes, amigurumi pigs, amigurumi birds, amigurumi penguins, amigurumi panda, amigurumi llama, amigurumi bunny, amigurumi clowns, amigurumi elephants, amigurumi hippos, amigurumi monkeys will not be difficult for you… Don’t forget to visit our YouTube channel…
Size: 12 cm (4,7″) tall when made with the indicated yarn.
Materials and tools:
3 mm (D-3) crochet hook.
Medium weight yarn in white, light blue, pink and (left over) turquoise.
Three 8 mm safety eyes.
Fiber fill.
Yarn needle.
Stitch markers.
Pins.
Scissors.
Abbreviations:
Rnd: Round
Mr: Magic ring
St: Stitch
Slst: Slip stitch
Ch: Chain
Sc: Single crochet
Inc: Increase
Dec: Decrease
AMIGURUMI BIRTHDAY PARTY MOUSE FREE PATTERN
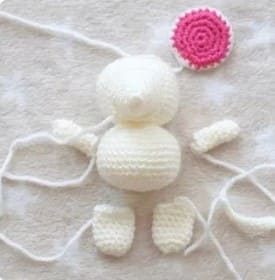
Head and Body
Use white yarn.
Rnd 1: start 6 sc in mr [6]
Rnd 2: inc in all 6 st [12]
Rnd 3: (sc in next st, inc in next st) x 6 [18]
Rnd 4: (sc in next 2 st, inc in next st) x 6 [24]
Rnd 5: (sc in next 3 st, inc in next st) x 6 [30]
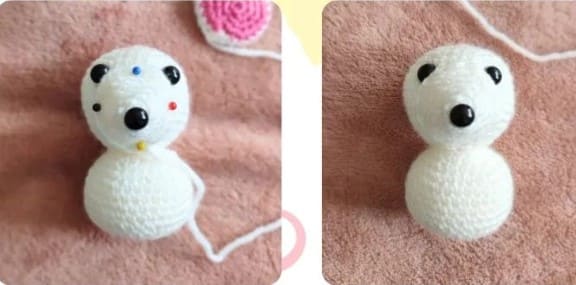
Rnd 6-13: sc in all 30 st [30]
Place the safety eyes between Rnd 7 and 8 with an interspace of 6 st.
Rnd 14: (sc in next 3 st, dec) x 6 [24]
Rnd 15: (sc next 2 st, dec) x 6 [18]
Rnd 16: (sc in next st, dec) x 6 [12]
Rnd 17: (sc in next st, inc in next st) x 6 [18]
Rnd 18: (sc in next 2 st, inc in next st) x 6 [24]
Rnd 19: (sc in next 3 st, inc in next st) x 6 [30]
Rnd 20: (sc in next 4 st, inc in next st) x 6 [36]
Rnd 21-25: sc in all 36 st [36]
Rnd 26: (sc in next 4 st, dec) x 6 [30]
Rnd 27: (sc in next 3 st, dec) x 6 [24]
Rnd 28: (sc in next 2 st, dec) x 6 [18]
Rnd 29: (sc in next st, dec) x 6 [12]
Rnd 30: dec 6 times [6]
Slst in next st. Fasten off and weave in the yarn end.
Snout
Use white yarn.
Rnd 1: start 5 sc in mr [5]
Rnd 2: sc in all 5 st [5]
Rnd 3: inc in all 5 st [10]
Rnd 4: sc in all 10 st [10]
Rnd 5: (sc in next st, inc in next st) x 5 [15]
Rnd 6: sc in all 15 st [15]
Rnd 7: (sc in next 2 st, inc in next st) x 5 [20]
Rnd 8: sc in all 20 st [20]
Rnd 9: (sc in next 3 st, inc in next st) x 5 [25]
Slst in next st. Fasten off and leave a long tail. Place a safety eye at the tip of the snout, that’ll be mouse’s nose.
Inner Ear (make two)
Use pink yarn.
Rnd 1: start 6 sc in mr [6]
Rnd 2: inc in all 6 st [12]
Rnd 3: (sc in next st, inc in next st) x 6 [18]
Rnd 4: (sc in next 2 st, inc in next st) x 6 [24]
Fasten off. Weave in the yarn end.
Outer Ear (make two)
Use white yarn. Follow the steps for the inner ear, but don’t fasten off, because in the next round the two ear parts will be joined together. Place together one outer and one inner ear with the wrong sides towards each other. Work the next round through both layers of the ear to join them.
Rnd 5: sc in all 24 st [24]
Tail
Use white yarn.
Ch 15, start in the second st from the hook.
Row 1: sc in next 14 st [14]
Leg (make two)
Use white yarn.
Rnd 1: start 6 sc in mr [6]
Rnd 2: inc in all 6 st [12]
Rnd 3-8: sc in all 12 st [12]
Slst in next st. Fasten off. Leave a long tail.
The legs don’t need to be stuffed.
Arm (make two)
Use white yarn.
Rnd 1: start 6 sc in mr [6]
Rnd 2-7: sc in all 6 st [6]
Slst in next st. Fasten off and leave a long tail.
The arms don’t need to be stuffed.
Garland
Use light blue yarn.
Ch 75, start in the second st from the hook.
Row 1: 2 sc in each of the next 74 st [148]
Sew the two ends of the garland onto each other, to make it form a hoop.
Party Hat
Use turquoise yarn.
Rnd 1: start 6 sc in mr [6]
Rnd 2: sc in all 6 st [6]
Rnd 3: (sc in next st, inc in next st) x 3 [9]
Rnd 4: sc in all 9 st [9]
Rnd 5: (sc in next 2 st, inc in next st) x 3 [12]
Rnd 6: sc in all 12 st [12]
Rnd 7: (sc in next 3 st, inc in next st) x 3 [15]

Assembly
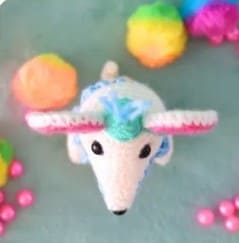
Use pins to position the snout onto the head, directly under the eyes, somewhere between Rnd 6 and 16. Then sew it on. Shape the face by indenting the eyes, using a strand of white yarn.
Sew the party hat onto the top of the head in the middle. Then sew the ears at either side of it with a few stitches onto the head and two stitches onto the party hat.
Sew the arms on either side of the body, between Rnd 19 and 22. Make the arms point downwards towards the middle of the belly. Sew the legs onto the bottom of the body. Make them point slightly outwards and make sure mouse can sit on her own.
Sew the tail onto the back of the body.
With a strand of turquoise yarn, embroider a strap from both sides of the party hat down through the neck. Weave in both yarn ends. Sew a few tufts of light blue yarn on top of the party hat.
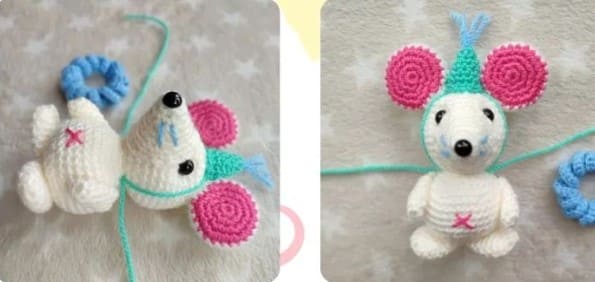
Embroider a small cross in the middle of mouse’s belly using pink yarn. Embroider two whiskers on each side of the snout with light blue yarn. Place the garland around mouse’s neck and your party mouse is finished!
More amigurumi mouse ideas: