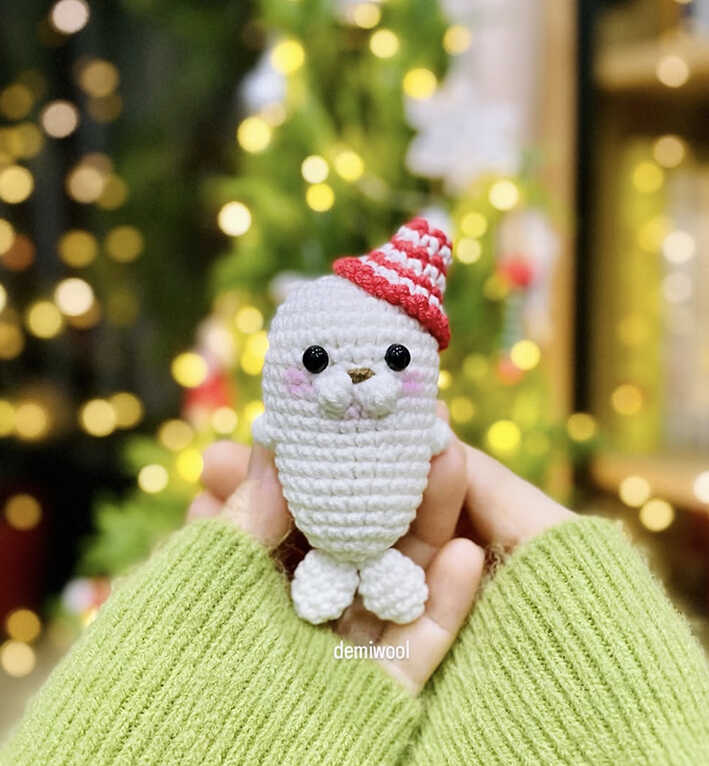
Cute Seal Amigurumi Free Crochet Pattern
Designer: demiwool
Instagram: @demiwool
Etsy Shop: demiwool
Difficulty Level: Beginner
A cozy holiday amigurumi project to bring a small festive smile to your crochet time.
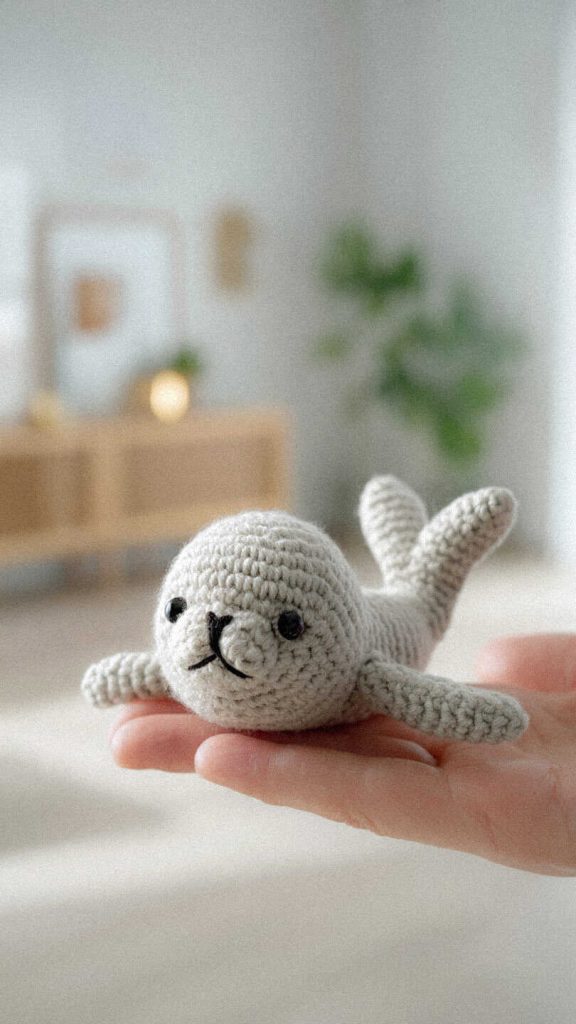
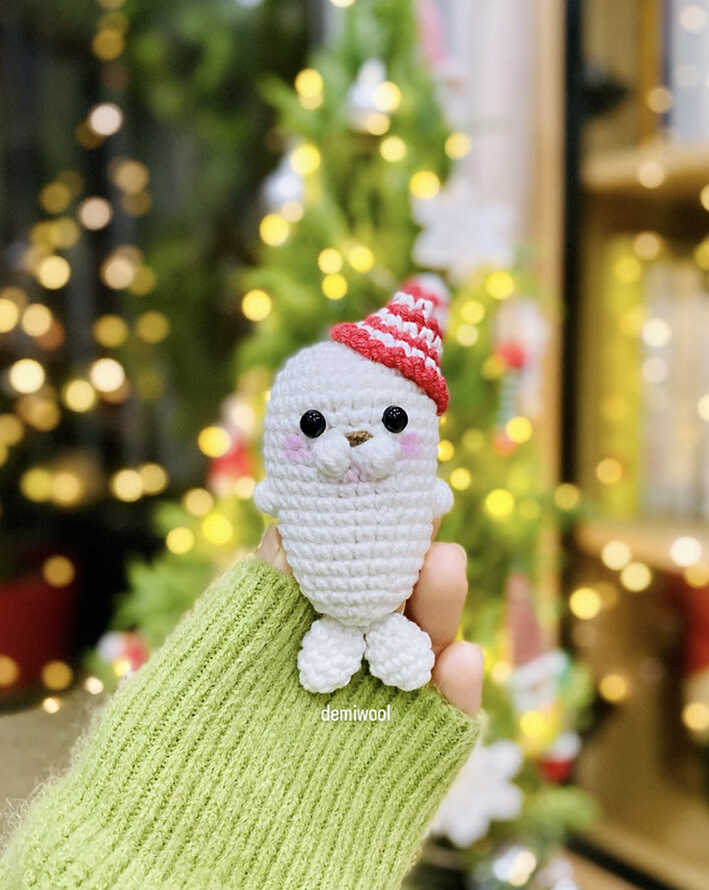
This free Christmas seal amigurumi crochet pattern is designed by demiwool and captures the playful, cheerful spirit of the holiday season. Featuring a cute seal wearing a tiny Christmas hat, this design is perfect for kids’ toys, seasonal decor, or thoughtful handmade gifts. With its soft shape and charming details, the finished seal measures approximately 7.6 cm (3 inches) in length, excluding the hat. We sincerely thank demiwool (Ravelry Store) for sharing this lovely festive design.
This is a beginner-friendly, step-by-step amigurumi pattern created using basic stitches only. The project is quick to make and follows a low-sew construction, making it ideal if you’re looking for an easy holiday crochet project that stays enjoyable and stress-free. Difficulty Level: Beginner, and it works well as a small seasonal piece you can finish in short crochet sessions.
The pattern is designed using cotton yarn for clean stitches and clear definition, while different yarn choices can slightly change the texture. To complete the project, you’ll only need yarn, a suitable hook, fiberfill stuffing, and basic tools. At the end of the pattern, you’ll also find Christmas seal amigurumi ideas for festive color variations and styling inspiration. If you enjoy small seasonal animals, you may also like the mini penguin amigurumi, another charming project shared on our blog.
You will need:
• Yarn: I used YarnArt Jeans cotton yarn (color: white, red)
• Hook: size 2.0mm
• Safety eyes: 6 mm
• Stitch markers
• Yarn needle
• Scissors
• Pins (optional)
• Toy stuffing
Abbreviations:
R – round
MR – magic ring
st – stitch
ch – chain
sc – single crochet
inc – increase
dec – decrease
slst – slip stitch
BO – Bobble Stitch = 5dc together
CHRISTMAS SEAL FREE CROCHET PATTERNS

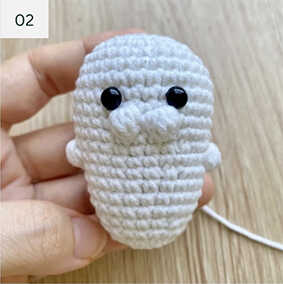
Head And Body
Use white yarn, work in continuous rounds.
R1: MR, 8 sc (8)
R2: Inc in each st around (16)
R3: (Sc, inc) x 8 (24)
R4: (3 sc, inc) x 6 (30)
R5: 30 sc (30)
R6: 30 sc (30)
R7: 30 sc (30)
R8: 30 sc (30)
R9: 14 sc, BO, 1 sc, BO, 13 sc (30)
R10: 30 sc (30)
R11: (8 sc, dec) x 3 (27)
R12: 8 sc, BO, 12 sc, BO, 5 sc (27)
Note:
• The BO stitches in R9 form the seal’s snout and the BOs in R12 form the seal’s arms.
• Depending on your stitch tension, you may slightly adjust the placement of the BOs in R12 so the arms are evenly aligned on both sides, with the snout centered on the front.
R13: (7 sc, dec) x 3 (24)
R14: 24 sc (24)
R15: 24 sc (24)
R16: 24 sc (24)
R17: 24 sc (24)
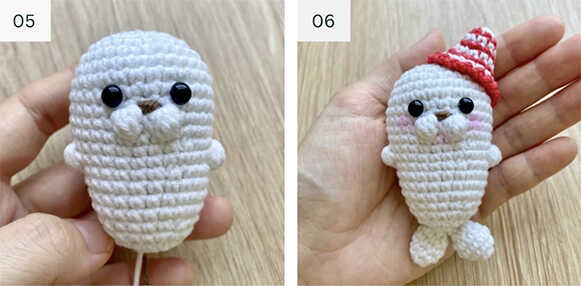
Insert the eyes between R7 and R8, directly above the snout, leaving 3–4 stitches between them.
Begin stuffing the head and body, continuing to stuff firmly as you work.
R18: (4 sc, dec) x 4 (20)
R19: 20 sc (20)
R20: (3 sc, dec) x 4 (16)
R21: Dec x 8 (8)
Stuff the body firmly.
Fasten off, cut the yarn, close the remaining opening, and weave in the ends.
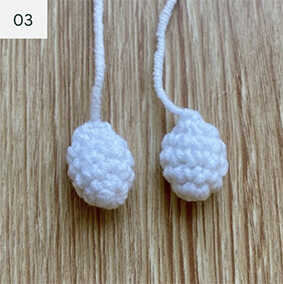
Tail
Make 2 pieces using white yarn. Work in continuous rounds.
R1: MR, 6 sc (6)
R2: (2 sc, inc) x 2 (8)
R3: 8 sc (8)
R4: 8 sc (8)
R5: (2 sc, dec) x 2 (6)
Do not stuff.
Fasten off, cut the yarn, close the opening, and leave a long tail for sewing.
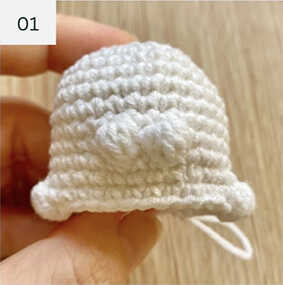
Hat
Work in continuous rounds.
Alternate colors as follows: R1, R3, R5, R7 in white, R2, R4, R6, R8 in red
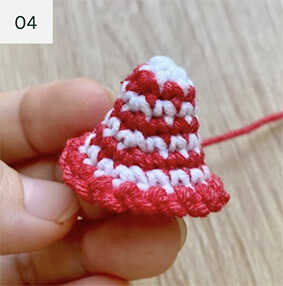
R1: MR, 6 sc (6)
R2: (2 sc, inc) x 2 (8)
R3: (3 sc, inc) x 2 (10)
R4: (4 sc, inc) x 2 (12)
R5: (5 sc, inc) x 2 (14)
R6: (6 sc, inc) x 2 (16)
R7: (7 sc, inc) x 2 (18)
R8: Sl st in first st, ch 2, sl st in next st.
Repeat (ch 2, sl st in next st) around.
Fasten off, cut the yarn, and leave a long tail for sewing.
Assembly
Embroider the nose using black or dark brown yarn between R8 and R9, centered between the two BO stitches of R9, approximately 1 stitch wide.
Sew the tails to the bottom of the body.
Sew the hat securely onto the head.
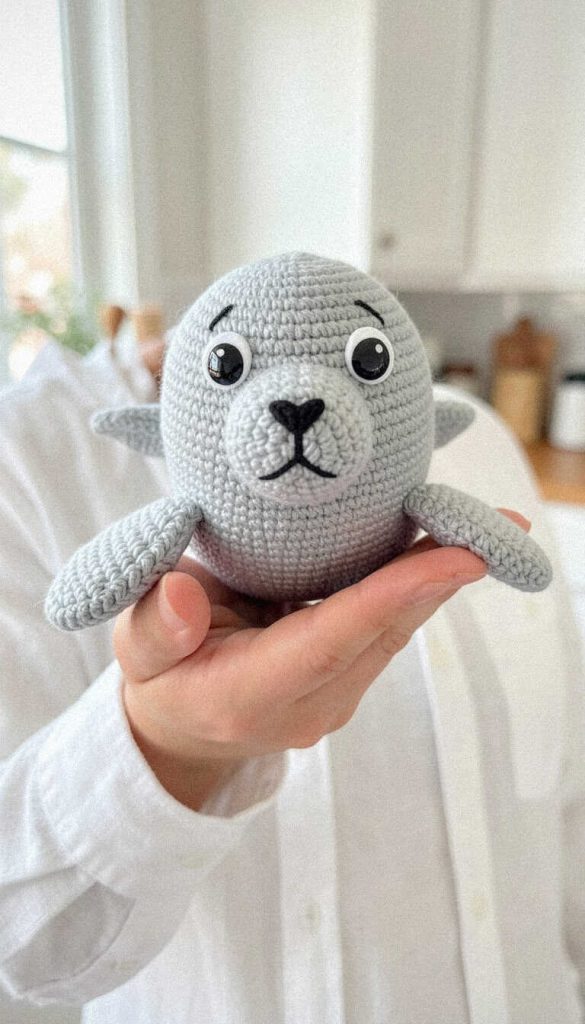
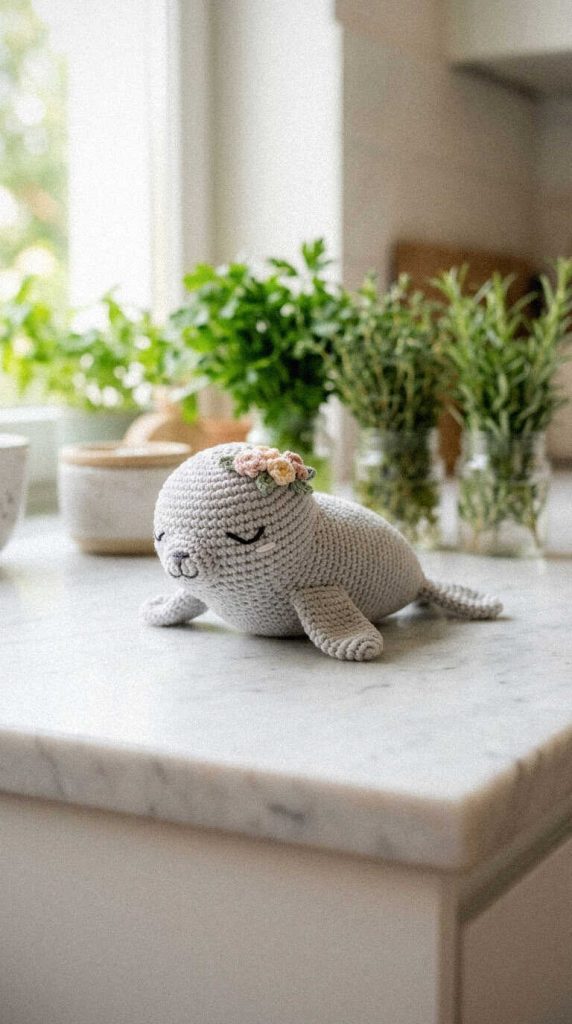
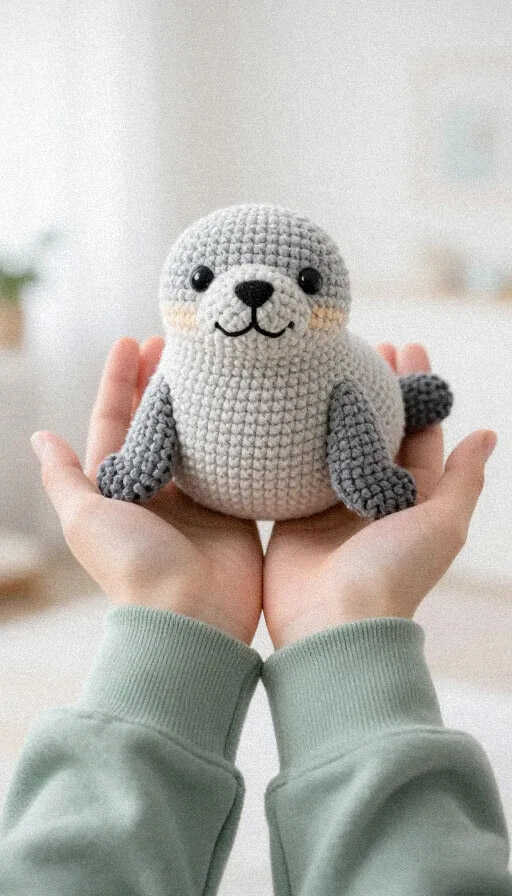
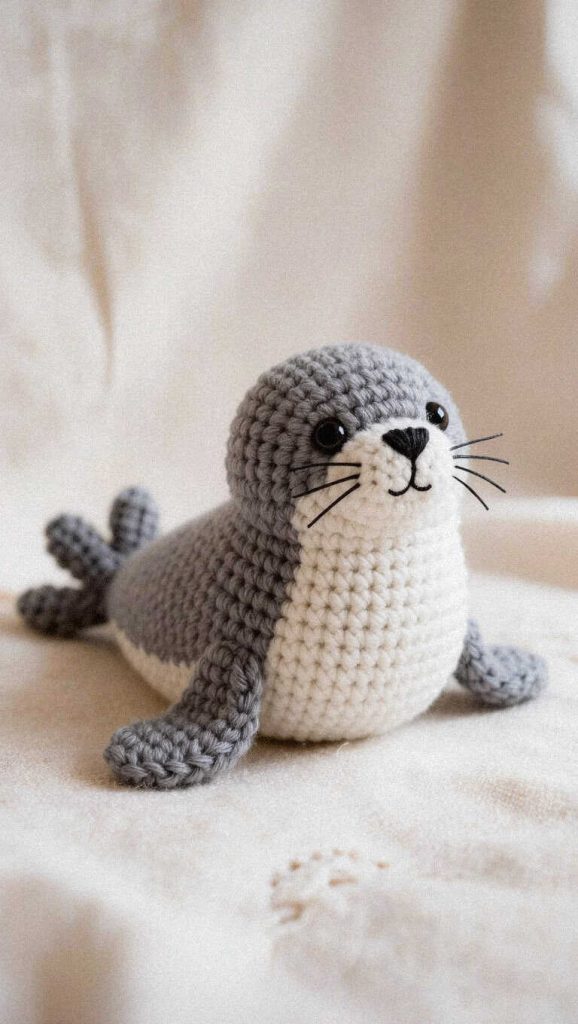
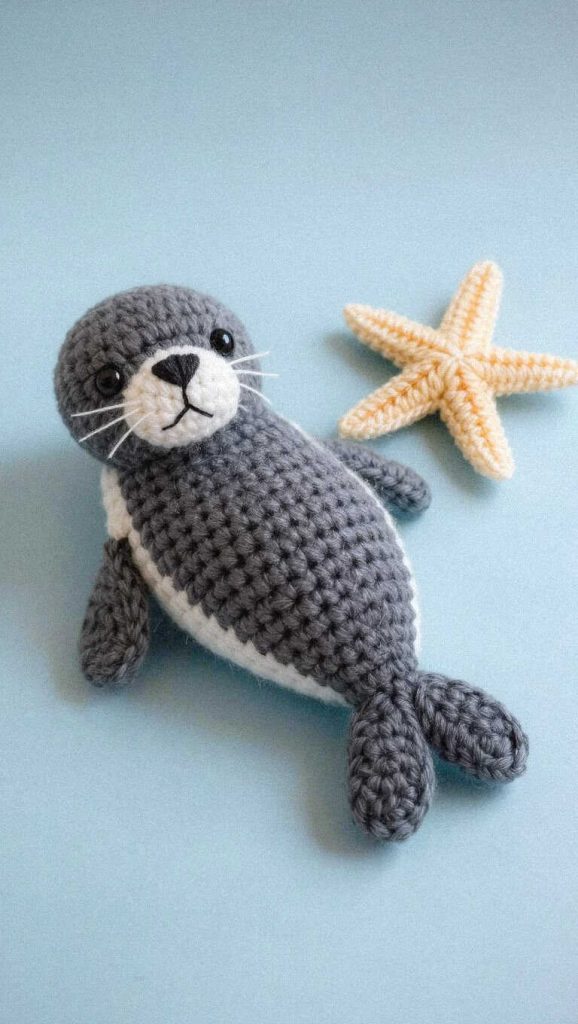
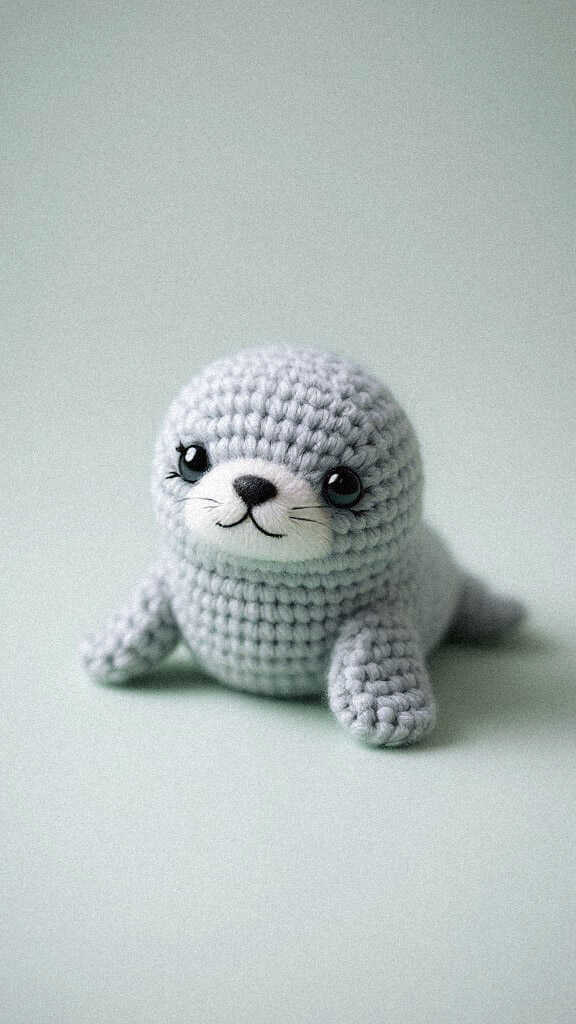
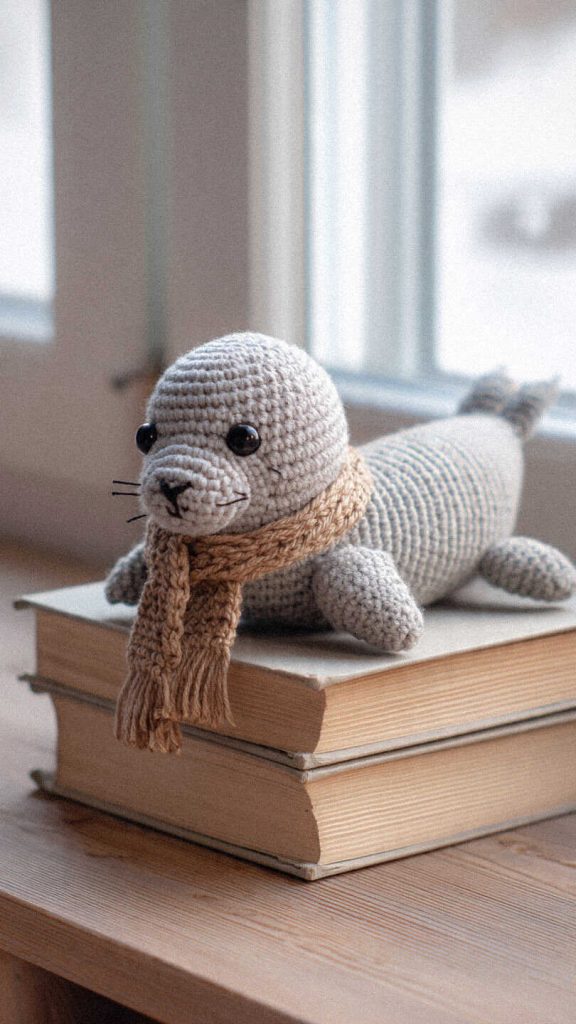
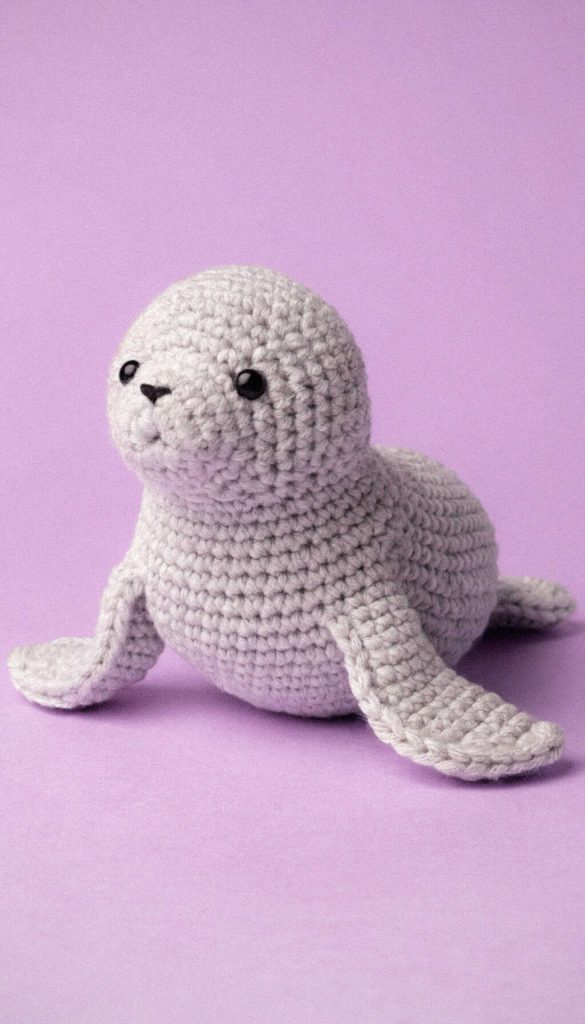
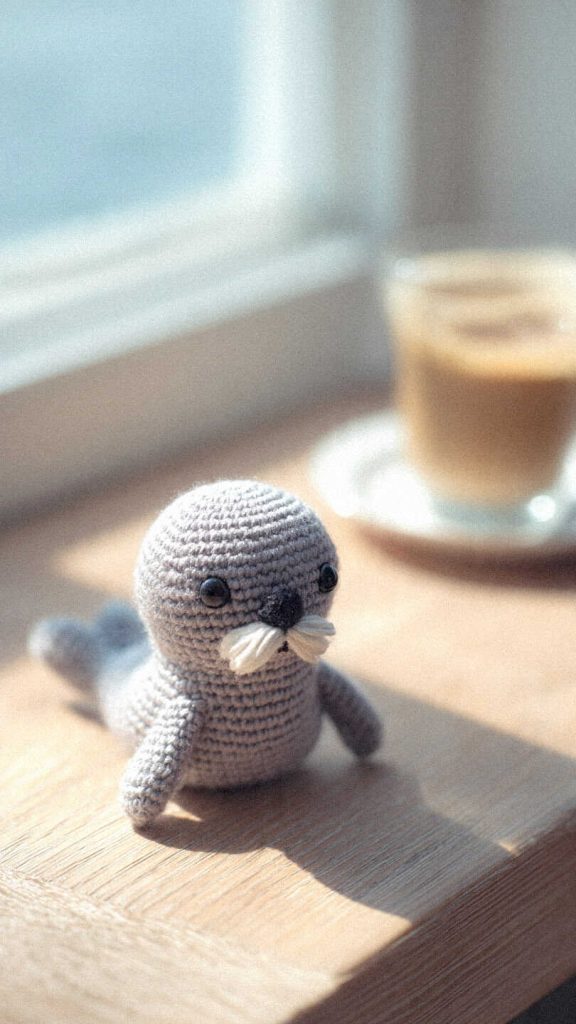
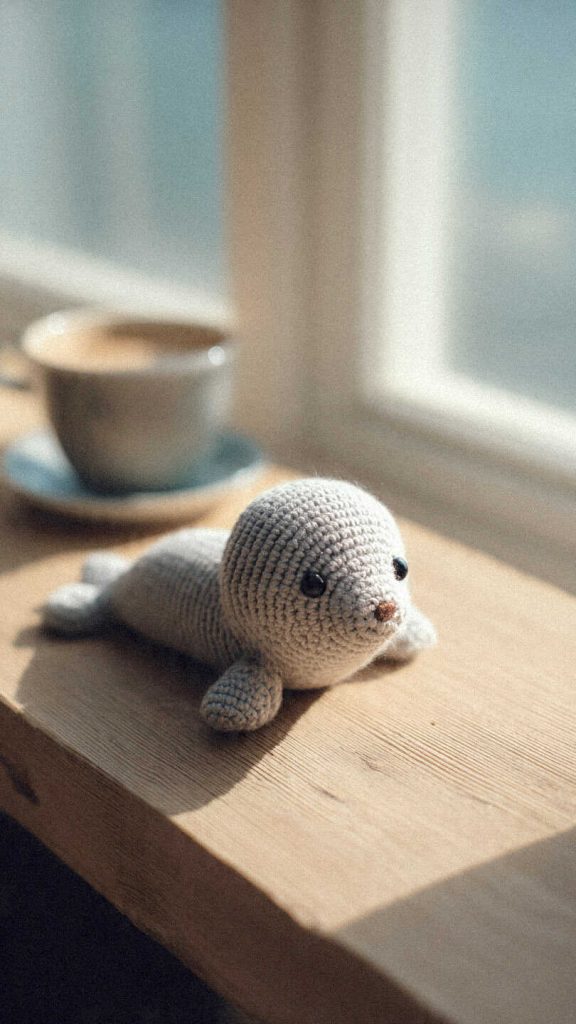
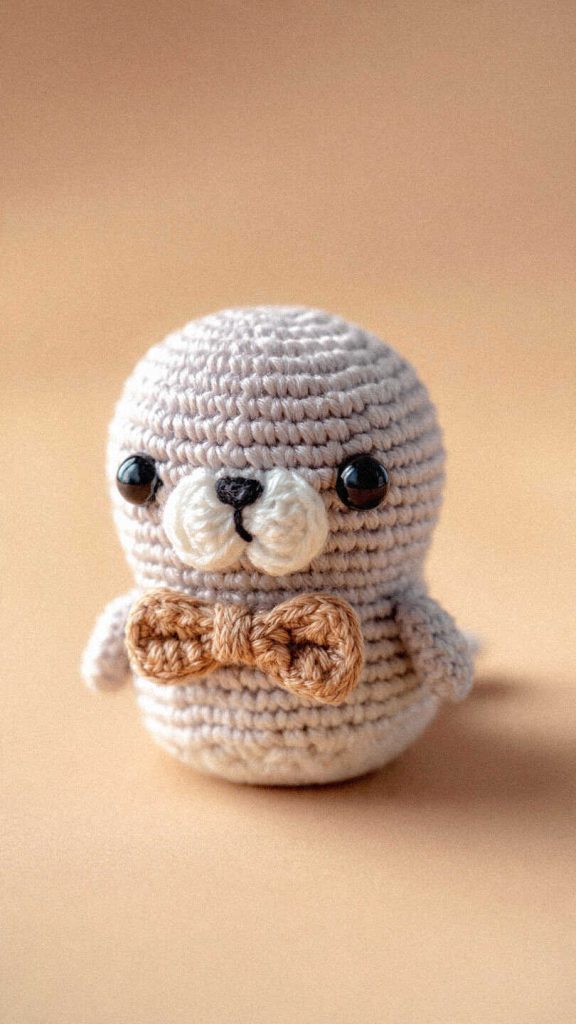
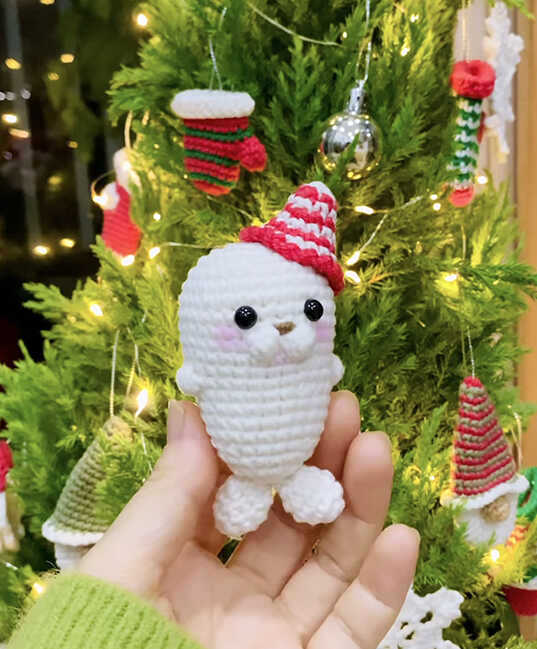
Take a look at these adorable seal amigurumi styles that highlight soft shapes, gentle colors, and charming character details. These cute crochet seals are loved as handmade gifts, nursery decor accents, or cozy shelf pieces that bring a calm ocean vibe.
Cute Seal Amigurumi Designs for Gifts & Nursery Decor