Monica Amigurumi Doll Free Crochet Pattern
Designer: Svetlana Raiskay
VK: @rayskaya_sveta
Difficulty Level: Beginner–Intermediate
A soft and elegant doll project designed for calm, detail-focused crochet time.
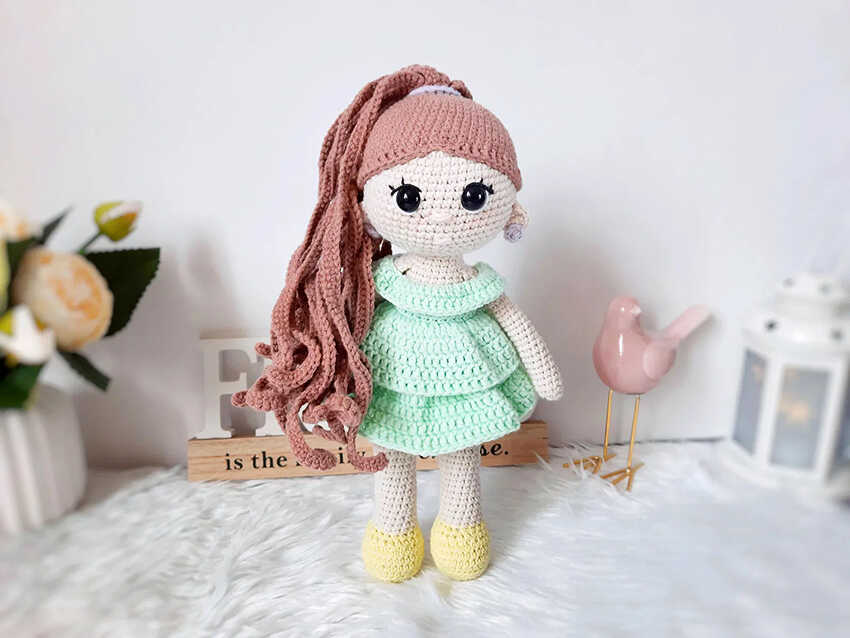
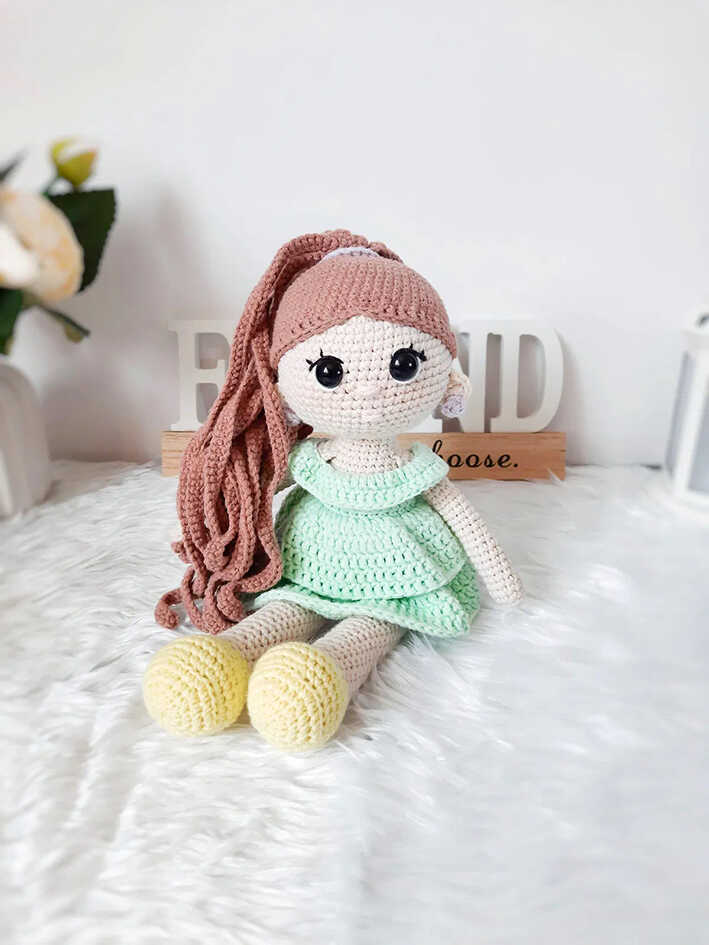
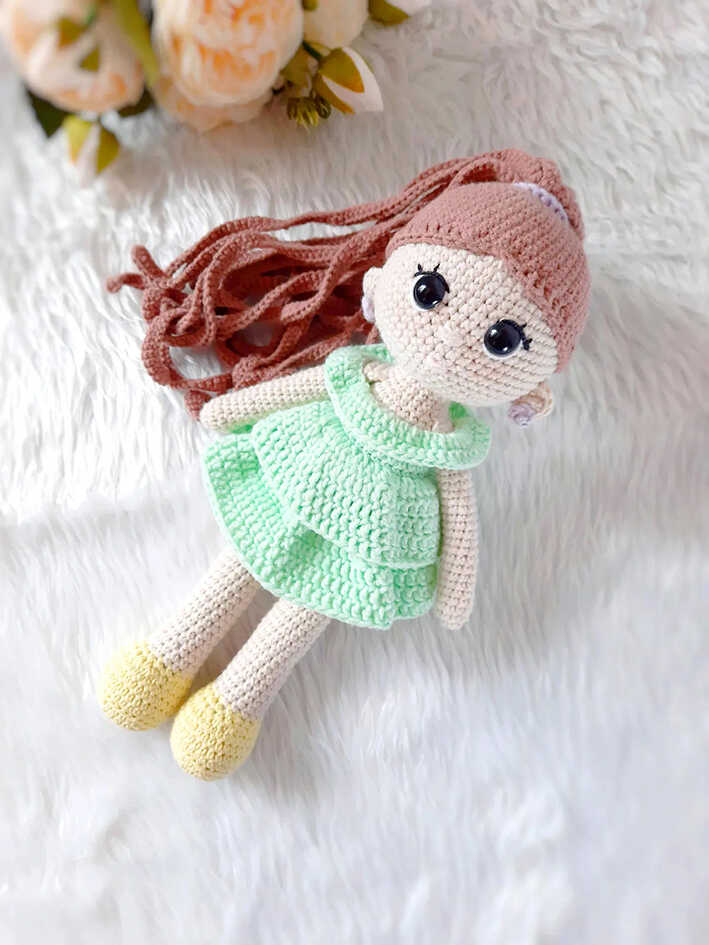
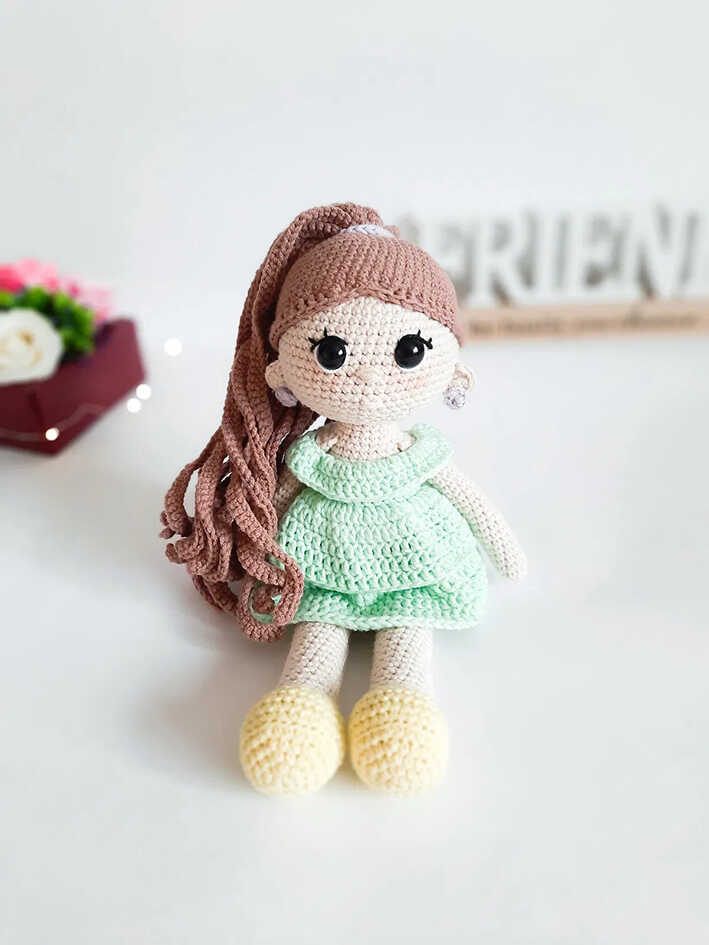
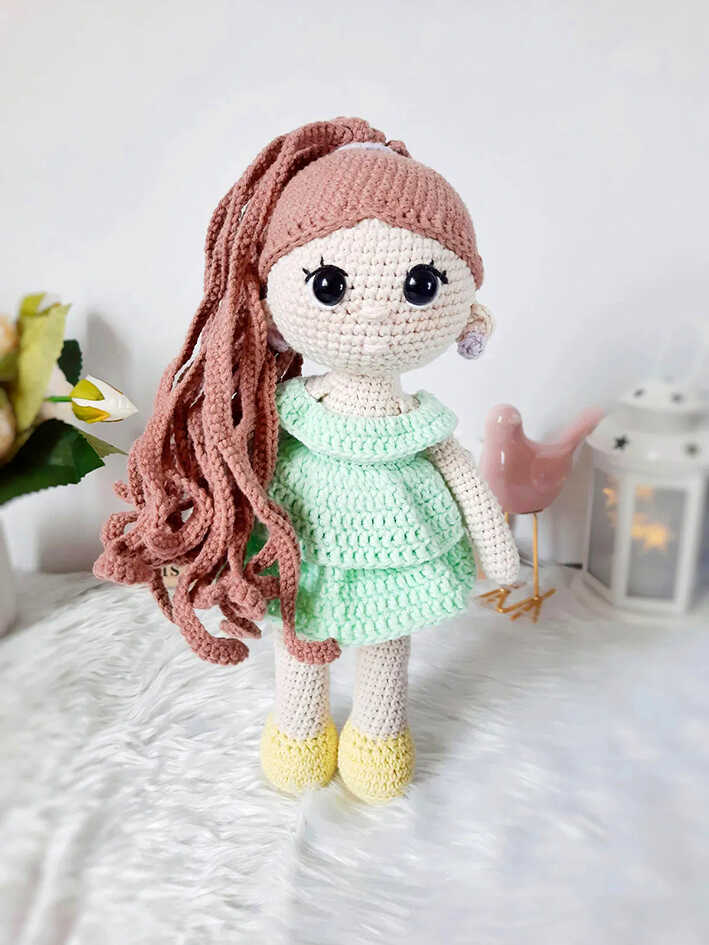
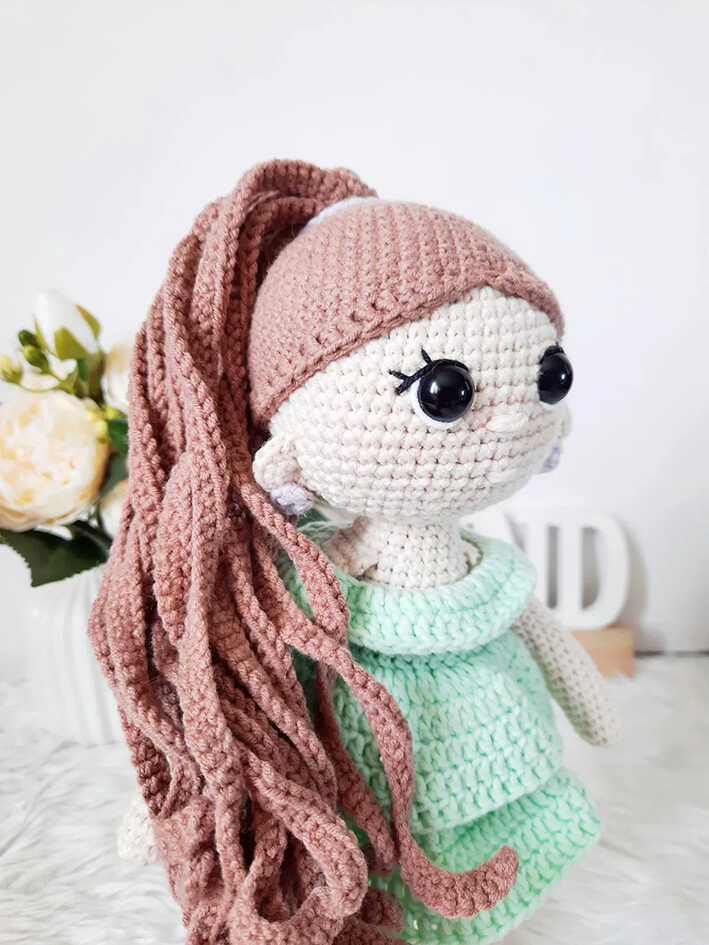
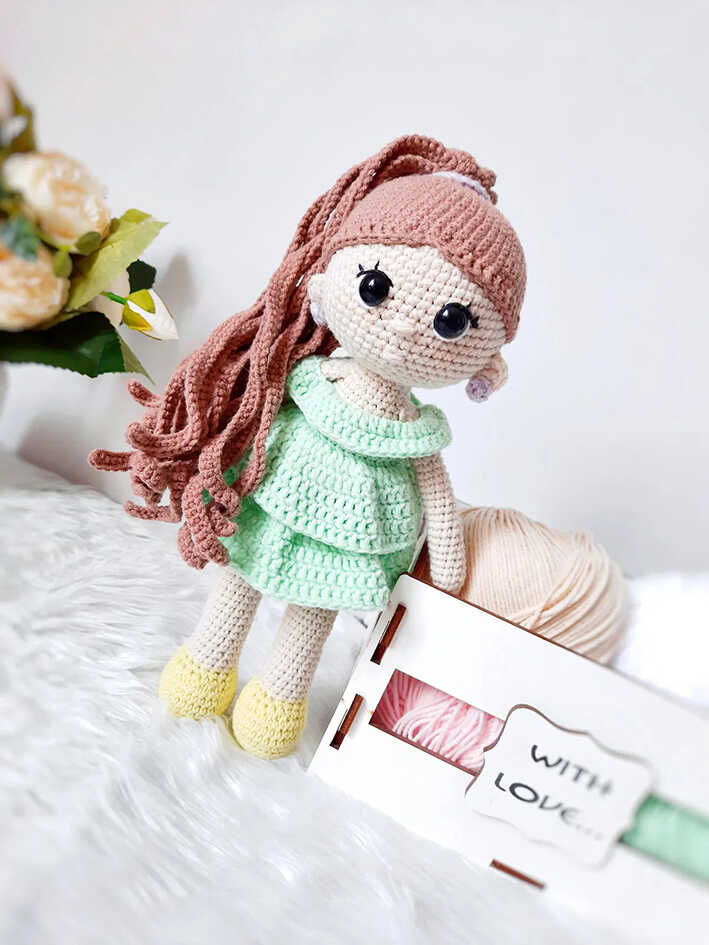
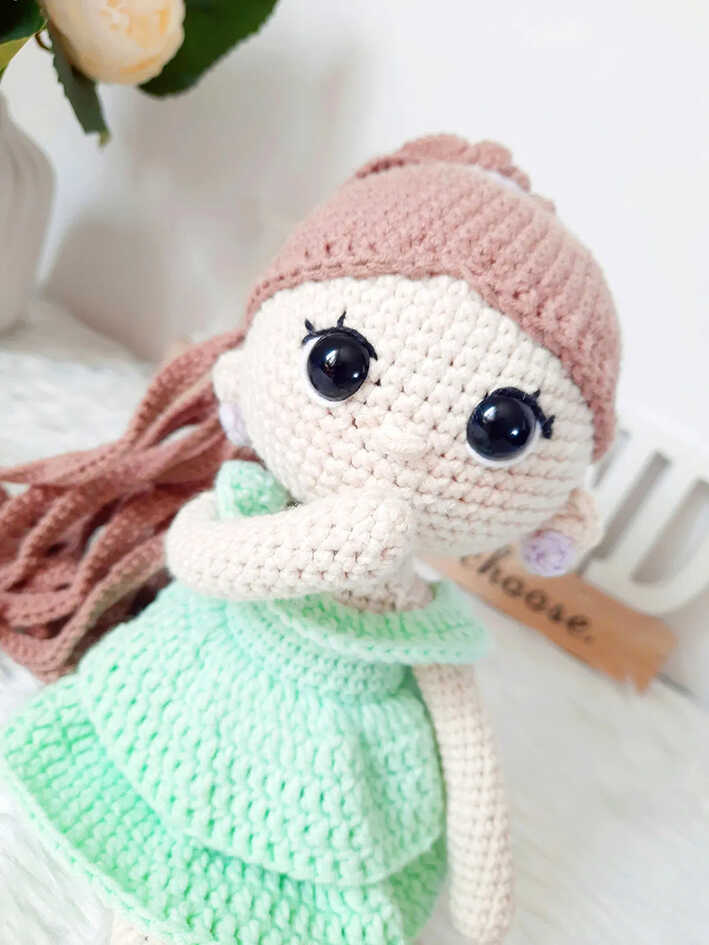
This Monica amigurumi doll free crochet pattern is designed by Svetlana Rayskaya (Ravelry) and features a cotton doll with a mint dress crocheted directly onto the body, gentle facial details, and fully crocheted curls gathered into a small ponytail. The clean shaping and balanced proportions give this doll a timeless handmade look, making it a lovely decorative piece or a thoughtful handmade gift.
The pattern is suitable for crocheters who are comfortable with basic shaping and color changes. Difficulty Level: Beginner–Intermediate, making it an ideal next-step project for those who want to move beyond simple toys. Cotton yarn such as YarnArt Jeans, a 2 mm hook, safety eyes, and a few basic tools are used to achieve crisp and well-defined results.
At the end of the pattern, you will also find related amigurumi doll ideas shared for extra inspiration, especially useful for creating ideas doll pins later on. If you enjoy exploring different styles, you may also like the little penguin amigurumi, another charming project shared across our blog network. We sincerely thank Svetlana Rayskaya for sharing this beautiful design.
Materials and Tools
- YarnArt Jeans yarn (50 g / 160 m):
▸ 05 light beige (0.5 skein)
▸ 79 mint (0.5 skein)
▸ 71 cocoa (0.5 skein)
▸ 67 lemon (small amount for shoes)
▸ 19 light lilac - A small amount of black, pink, and white yarn for facial details
- 2 mm crochet hook
- 10 mm safety eyes
- Fiberfill stuffing
- Stitch markers
- Pins
- Blush and dry pastel for cheeks
- Needle for sewing parts
- Scissors
Finished size of the toy is approximately 25 cm.
Abbreviations
MR – magic ring
sl st – slip stitch
ch – chain
sc – single crochet
dc – double crochet
hdc – half double crochet
inc – increase
dec – decrease
(…) x n – repeat n times
FREE MONICA AMIGURUMI DOLL CROCHET DESIGN
Head
Work with light beige yarn.
R1: 6 sc in MR
R2: inc x6 (12)
R3: (1 sc, inc) x6 (18)
R4: 1 sc, inc, (2 sc, inc) x5, 1 sc (24)
R5: (3 sc, inc) x6 (30)
R6: 2 sc, inc, (4 sc, inc) x5, 2 sc (36)
R7: (5 sc, inc) x6 (42)
R8: 3 sc, inc, (6 sc, inc) x5, 3 sc (48)
R9: (7 sc, inc) x6 (54)
R10–R20: 54 sc (11 rounds)
If using safety eyes, insert them between R14 and R15.
Approximate distance between eyes is 7 stitches.
R21: (7 sc, dec) x6 (48)
R22: 3 sc, dec, (6 sc, dec) x5, 3 sc (42)
R23: (5 sc, dec) x6 (36)
R24: 2 sc, dec, (4 sc, dec) x5, 2 sc (30)
R25: (3 sc, dec) x6 (24)
R26: 1 sc, dec, (2 sc, dec) x5, 1 sc (18)
Stuff firmly. Leave a long tail for sewing.
Ears (2 pieces)
Work with light beige yarn.
R1: 6 sc in MR
Tighten the ring, do not join.
Ch 1, turn your work.
R2: 6 sc
Fasten off, leaving a long tail for sewing.
Earrings (2 pieces)
Work with light lilac yarn.
R1: 6 sc in MR
Fasten off, leaving a long tail for sewing.
Arms (2 pieces)
Work with light beige yarn.
R1: 5 sc in MR
R2: inc x5 (10)
R3–R25: 10 sc (23 rounds)
Stuff while crocheting: bottom very firmly, middle moderately, top part (about 1–2 cm) may be left unstuffed.
Fold the arm in half and crochet 5 sc through both loops.
Fasten off and hide the yarn.
Make the second arm the same way.
Legs (2 pieces) + Body
Start with lemon-colored yarn.
R1: 6 sc in MR
R2: inc x6 (12)
R3: (1 sc, inc) x6 (18)
R4: (2 sc, inc) x6 (24)
R5: (3 sc, inc) x6 (30)
R6: 30 sc in back loops only
R7–R9: 30 sc (3 rounds)
R10: 9 sc, dec x6, 9 sc (24)
R11: (2 sc, dec) x6 (18)
Change to light beige yarn.
R12: (4 sc, dec) x3 (15)
R13–R34: 15 sc (22 rounds)
Stuff legs while crocheting: bottom very firmly, middle moderately, top part (about 1 cm) may be left unstuffed.
Align the edges so the piece folds evenly. Add or undo stitches if needed (I crocheted an additional 4 sc on each leg).
Fold and crochet 7 sc through both loops.
Fasten off and hide the yarn.
Make the second leg the same way, but do not cut the yarn. Start joining the legs.
R35: From the second leg, ch 4 and join to the first leg with sl st. Make sure the legs face forward.
14 sc in back loops of the first leg,
4 sc along the chain,
14 sc in back loops of the second leg,
4 sc along the chain (36)
Place a marker at the front center.
R36: (5 sc, inc) x6 (42)
R37–R42: 42 sc (6 rounds)
Move the marker to the center of the back by crocheting an additional 16 sc if needed. This will be the new beginning of the round.
Change to mint yarn.
R43: 42 sc
R44: 42 sc in back loops only
R45: (5 sc, dec) x6 (36)
R46–R47: 36 sc (2 rounds)
R48: (4 sc, dec) x6 (30)
R49: 30 sc in back loops only
R50–R52: 30 sc (3 rounds)
R53: (3 sc, dec) x6 (24)
R54: 24 sc in back loops only
Change to light beige yarn.
R55: 24 sc
Next round, crochet the arms in place. Make sure they are positioned symmetrically.
R56: 2 sc, 5 sc (attach arm), 7 sc, 5 sc (attach arm), 5 sc (24)
R57: (2 sc, dec) x6 (18)
R58–R59: 18 sc (2 rounds)
Stuff the body firmly. Fasten off and hide the yarn.
First Skirt
Return to R44 (worked in back loops only) and attach mint yarn.
Work dc in front loops around.
R1: ch 2, 2 dc in each stitch around, sl st (84)
Join with sl st and continue working in rounds.
Each round starts with ch 2 and ends with sl st.
R2–R6: 84 dc (5 rounds)
Fasten off and hide the yarn.
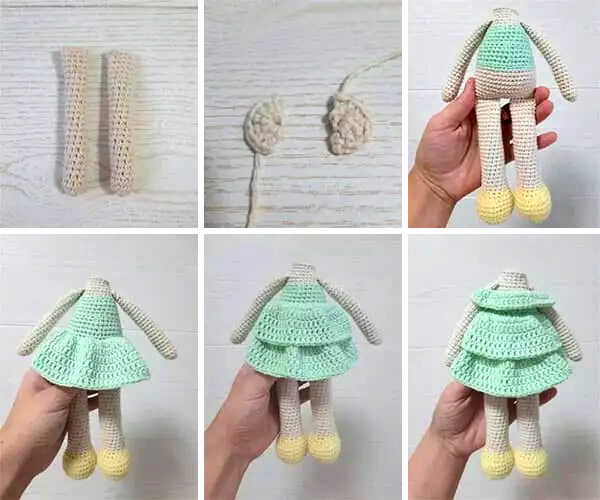
Second Skirt
Return to R49 (worked in back loops only) and attach mint yarn.
Work dc in front loops around.
R1: ch 2, 2 dc in each stitch around, sl st (60)
Join with sl st and continue working in rounds.
Each round starts with ch 2 and ends with sl st.
R2–R5: 60 dc (4 rounds)
Fasten off and hide the yarn.
Collar
Return to R54 (worked in back loops only) and attach mint yarn.
Work sc in front loops around.
R1: ch 1, 4 sc, ch 10, skip next 4 stitches, 9 sc, ch 10, skip next 4 stitches, 3 sc (36)
Continue with dc. Join with sl st and work in rounds.
Each round starts with ch 2 and ends with sl st.
R2: inc in each stitch: 8 dc, 20 dc along the chain, 18 dc, 20 dc along the chain, 6 sc (72)
R3: 72 dc
Fasten off and hide the yarn.
Hair Details
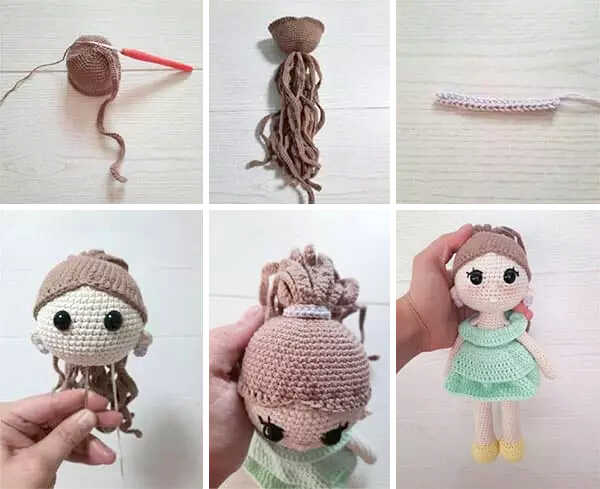
Wig
Work with cocoa-colored yarn.
R1: 6 sc in MR
R2: inc x6 in back loops only (12)
R3: (1 sc, inc) x6 in back loops only (18)
R4: (2 sc, inc) x6 (24)
R5: (3 sc, inc) x6 (30)
R6: (4 sc, inc) x6 (36)
R7: (5 sc, inc) x6 (42)
R8: (6 sc, inc) x6 (48)
R9: (7 sc, inc) x6 (54)
R10–R18: 54 sc (9 rounds)
R19: ch 2, 24 dc, 1 hdc, 1 sc, 2 sl st, 1 sc, 1 hdc, 24 dc
Join with sl st. Fasten off and hide the yarn.
Curls
Return to R2 where back loops were used and attach cocoa yarn.
Ch 76 and starting from the second chain from hook, crochet 75 sc.
First curl is complete.
Sl st into the next stitch of the round and ch 76 again.
From the second chain from hook, crochet 75 sc.
Sl st into the next stitch.
Repeat until you have 18 curls.
Hair Band
Work with light lilac yarn.
Ch 22 and starting from the second chain from hook, crochet 21 sc.
Fasten off, leaving a long tail for sewing.
Assembly and Finishing
Start by assembling the head.
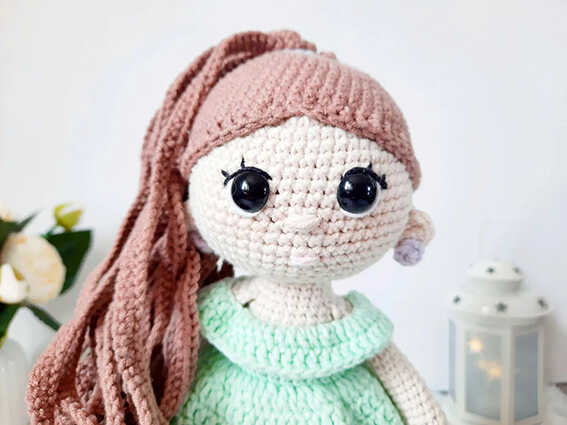
Sew the ears between R17 and R21 with a distance of 5 rounds, securing with pins first. Ears must be symmetrical.
Sew the earrings slightly below the center of the ears.
Sew the wig, securing it with pins beforehand.
Embroider the nose with light beige yarn.
Embroider eye whites with white yarn.
Embroider eyelashes with black yarn.
Use blush or dry pastel to color the cheeks and nose.
Embroider the mouth with pink yarn.
Sew the head and body together, securing with pins around first.
When a small opening remains, stuff the space between the neck and head firmly so the head does not wobble.
Close completely and hide the yarn inside.
Sew the hair band onto the ponytail.
Copyright & Credits
This pattern is designed by Svetlana Rayskaya.
The pattern itself may not be redistributed, copied, translated, or republished in any form without the designer’s permission.
You may sell finished toys made from this pattern, provided the designer is clearly credited and tagged on social media.