Baby Tiger Amigurumi Free Crochet Pattern – Cute Mini Plush Design
Designer: Uliya Ross
Instagram: @uliyaross
Difficulty Level: Beginner
A playful jungle project to brighten your crochet time
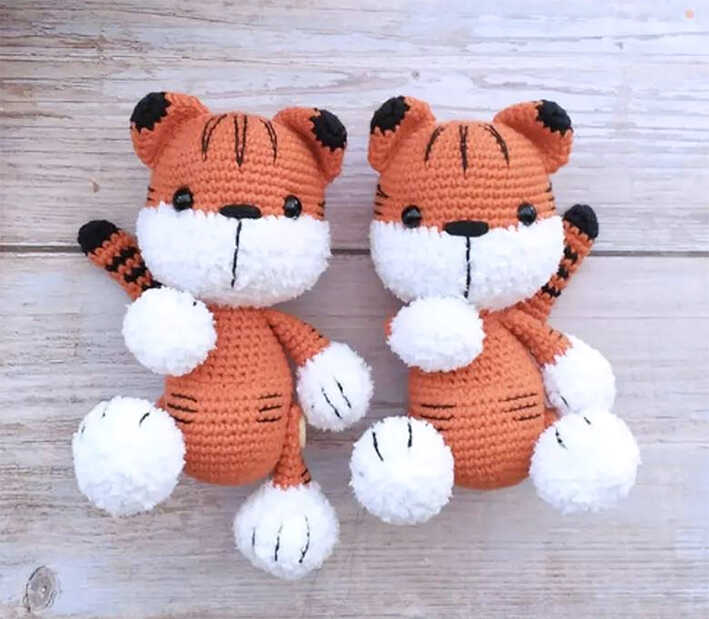
Bring a fun handmade touch to your collection with this baby tiger amigurumi free crochet pattern. Its striped body and sweet expression make this cute crochet animal a lovely handmade gift idea for nursery decor or cozy shelves. We sincerely thank the designer for sharing this adorable tiger design, and you will also find inspiring tiger amigurumi ideas at the end of the pattern.
Curious how this tiny tiger comes together Scroll down to find the original pattern source.
This is a beginner crochet project made with basic stitches and simple shaping. Using textured yarn and a 2.0 mm hook, the finished tiger measures approximately 16 cm (6.3 inches) tall, making it ideal for gifts and soft display pieces. If you enjoy jungle animals, you might also love the zebra amigurumi from our blog.
The pattern uses textured yarn for a soft finish, while different yarn choices can slightly change the final size. To complete this project, you only need yarn, safety eyes, fiberfill, and basic tools. For more animal ideas, check out the rhino amigurumi, and do not forget to explore the tiger-themed ideas shared at the end of the pattern.
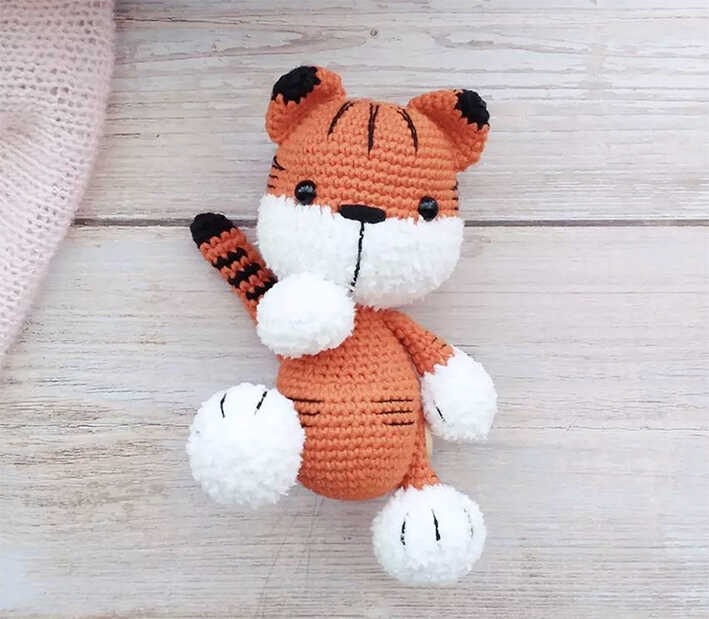
This baby tiger is just the final look scroll to see every cute detail
Materials
• Yarn (black, orange, textured white).
• 2.0 mm crochet hook.
• Plastic eyes size 6 – 8 mm, glue.
• Stuffing fiber, needle, pins, scissors.
Abbreviations
MR: Amigurumi Magic ring
sc : Single Crochet
inc : Increase
dec : Decrease
tr : Triple Crochet/ Treble Crochet
st: Stitch
dc : Double Crochet
hdc: Half Double Crochet
slst : Slip Stitch
ch : Chain
..in : make increase into same stitch as many as the number which is given in front of “inc” abbreviation (exp; 3inc, 4inc..).
FLO : Crochet into front loops only
BLO : Crochet into back loops only
slstdec: slip stitch decrease
HOW TO CROCHET A CUTE BABY TIGER AMIGURUMI
Head
Fill in as crocheting progresses
in main color
1– 5 sc in MR
2– 5 inc (10)
3– (inc)*5 (20)
4– (3 sc, inc)*5 (25)
5– (4 sc, inc)*5 (30)
6– (5 sc, inc)*5 (35)
7– (6 sc, inc)*5 (40)
8– (7 sc, inc)*5 (45)
9– (8 sc, inc)*5 (50)
10-16– 50 sc (7 rows)
Change to textured white color
17-19– 50 sc (3 rows)
20– (8 sc, dec)*5 (45)
21– (7 sc, dec)*5 (40)
22– (2 sc, dec)*10 (30)
23– (1 sc, dec)*10 (20)
24– 20sc
Cut the yarn and hide the yarn.
Body
Fill in as crocheting progresses
1– 5 sc in MR
2– 5 inc (10)
3– (inc)*10 (20)
4– (3sc, inc)*5 (25)
5– (4sc, inc)*5 (30)
6– (5sc, inc)*5 (35)
7– (6sc, inc)*5 (40)
8-14– 40sc (7 filas)
15– 15sc, (5slstdec), 15sc (35) (slstdec,insert the needle through the front loops of each of the next two sc, make a yarn over and pull it through all three loops together)
16– 35sc
17– (5sc, dec)*5 (30)
18-19– 30sc (2 rows)
20– (4sc, dec)*5 (25)
21– 25sc
22– (3sc, dec)*5 (20)
23-24– 20sc (2 filas)
Cut the yarn, leaving a long tail for sewing.
Arms
Stuff the hand well, you can Slightly Stuff the arm.
Start crocheting with textured white yarn
1– 6sc in MR
2– 6inc (12)
3– (2sc, inc)*4 (16)
4-5– 16sc (2 rows)
6– 3sc, (dec)*5, 3sc (11)
7– 11sc
Change to main color
8-13– 11sc (6 rows) + crochet an additional 5sc
Fold the arm, join with 5sc. Cut the yarn leaving a long tail for sewing.
Legs
Stuff the foot well, you can slightly stuff the leg.
Start crocheting with textured white yarn
1– 6sc in MR
2– 6inc (12)
3– (1sc, inc)*6 (18)
4– (2sc, inc)*6 (24)
5-6– 24sc (2 rows)
7– 3sc, (1sc, dec)*6, 3sc (18)
8– 3sc, (dec)*6, 3sc (12)
9– 12sc
Change to main color
10-16– 12pb (7 fias) + crochet an additional 2 sc
Fold the leg, join with 6sc. Cut the yarn leaving a long tail for sewing.
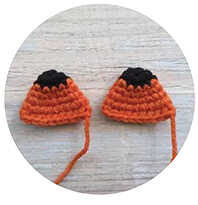
Ears
Start crocheting with black yarn
1– 6sc in MR
2– 6inc (12)
Cambiar a color principal
3-4– 12sc (2 rows)
5– (1sc, inc)*6 (18)
6– 18sc + crochet an additional 2 sc
Fold the ear, join with 9sc. Cut the yarn leaving a long tail for sewing.
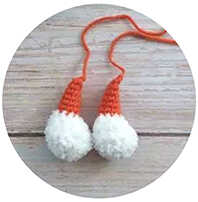
Tail
Can be stuffed lightly
Start crocheting with black yarn
1– 8sc in MR
2– 8sc
3– (3sc, aum)*2 (10)
Change to main color, do not cut the black yarn.
4-5– 10sc (2 filas)
6– 4sc main color, 4sc black, 2sc main color (10)
7– 10 sc main color (10)
8– 5sc main color, 4 sc black, 1 sc main color (10)
9– 10sc main color (10)
10– 6sc main color 4 black (10)
Next crochet all rows in main color
11-25– 10 sc (15 rows)
Fold the tail, join with 5sc. Cut the yarn leaving a long tail for sewing.
Assembly
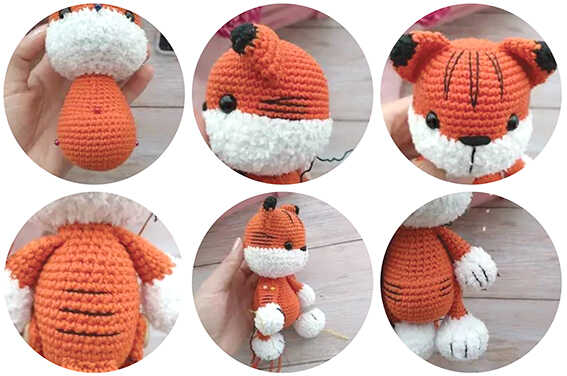
Head decoration
To make everything symmetrical, we pinned the center of the belly roughly above where we made the decreases.
We mark the center above the textured white, we also mark the center of the head.
Sew the eyes between rows 15 and 16 with a distance between them of 13 sc.
Based on the center of the head that we marked, we embroider the Nose and the mouth.
Sew the ears to the head, start sewing them between rows 3 and 4
Sew the arms on row 23, with a distance of about 6 to 7 single crochets.
Sew the legs to the body, between rows 9 and 10 (based on the midpoint marked on the body) with a distance of 21 sc.
Sew the tail between rows 8 and 9
Embroider the stripes on the head, body, legs and hands.