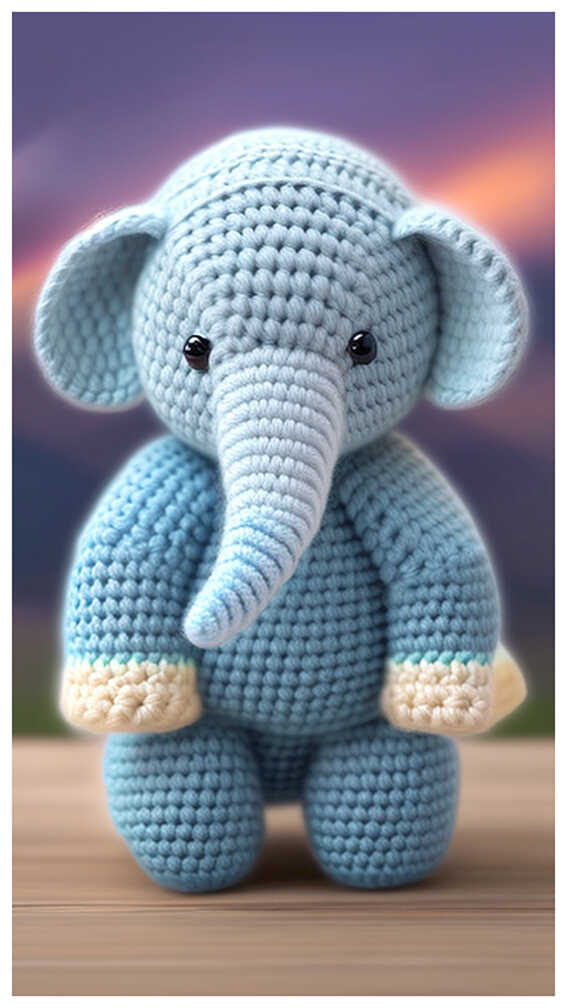
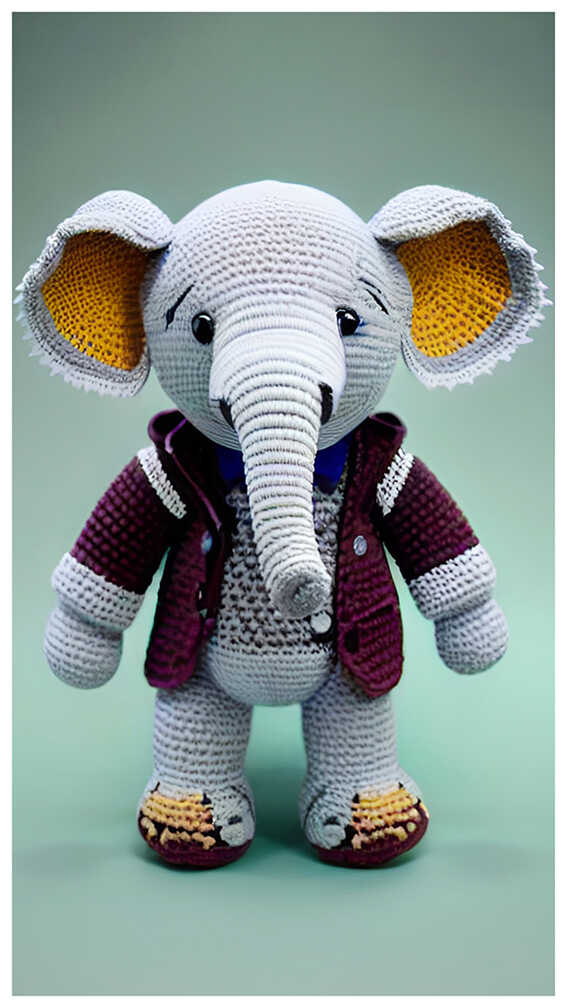
Amigurumi Elephant Crochet Free Pattern
Designer: Ekaterina Mizinova
Difficulty Level: Intermediate
A rewarding crochet project for makers who love detailed animal designs
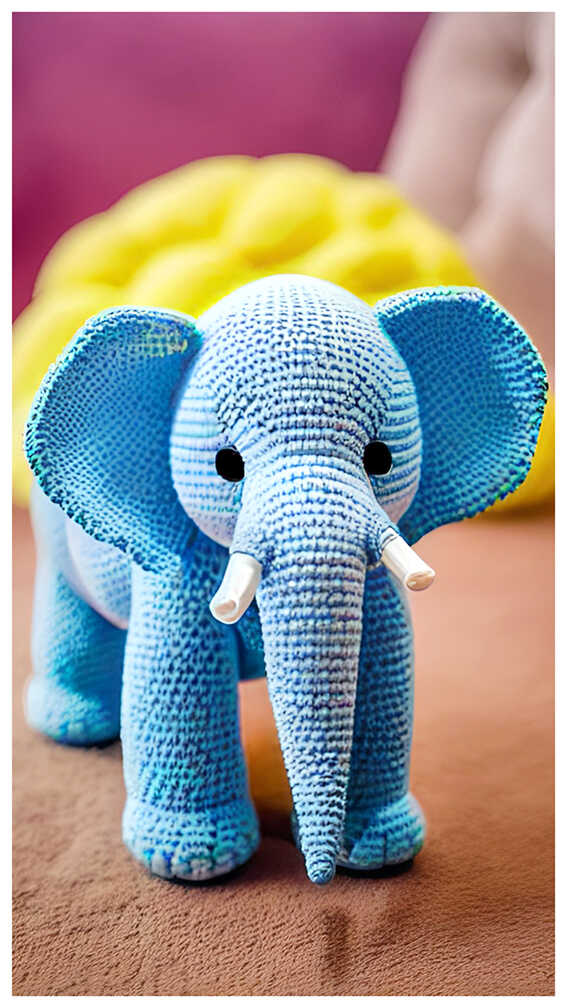
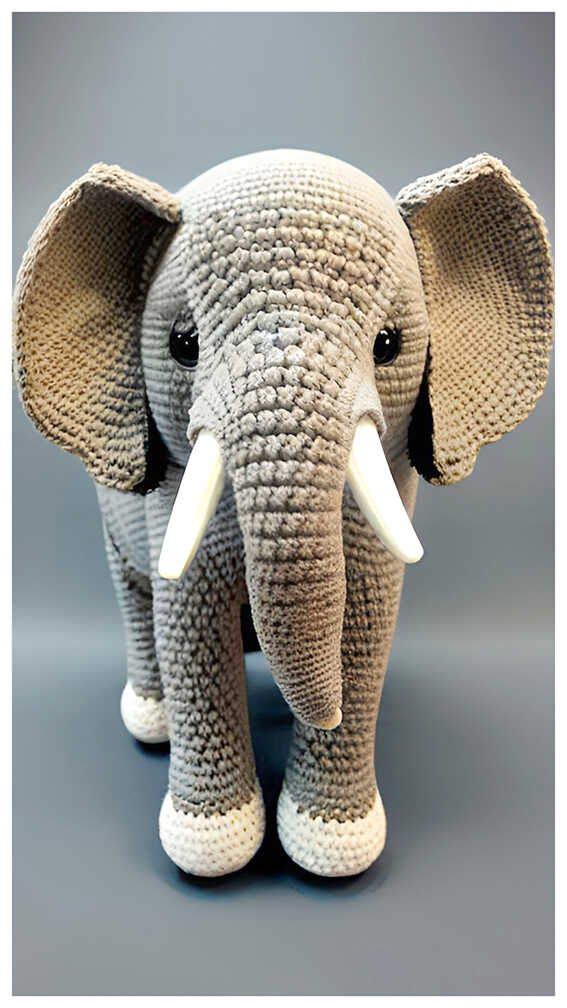
Some amigurumi projects are all about impressive shaping, and this free elephant amigurumi pattern by Ekaterina Mizinova is a beautiful example of that craftsmanship. With sculpted features, expressive details, and a generous finished size, this soft crochet toy makes a memorable handmade gift idea or standout nursery display piece. We sincerely thank Ekaterina Mizinova for generously sharing this remarkable elephant design with the crochet community, and you’ll find more elephant-inspired amigurumi ideas at the end of the pattern.
This is an advanced amigurumi pattern created for experienced crocheters who enjoy shaping, sculpting, and detailed finishing techniques. If you love safari-inspired handmade animals, you may also enjoy the giraffe amigurumi from one of our other blogs.
Lightweight yarn and a fine 1.5 mm hook help create crisp shaping and polished details, resulting in a finished elephant measuring approximately 32 cm. You only need yarn, stuffing, button eyes, and basic tools to complete this cozy crochet project. For another charming animal make, explore the hippo amigurumi, and don’t forget to browse the related amigurumi ideas shared at the end of the pattern.

Keep scrolling for more beautiful elephant amigurumi ideas and safari crochet favorites.
Materials
• Yarn
‣ Pekhorka “Children’s Novelty” – Light Gray (08) – 2 skeins
• 1.5 mm crochet hook
• 10 mm button eyes or beads
• Fiberfill stuffing
• Yarn needle for sewing
• Large needle for sculpting
Using these materials, the finished toy measures approximately 32 cm.
Abbreviations
MR – magic ring
ch – chain
sc – single crochet
inc – increase
dec – decrease
BLO – back loop only
FLO – front loop only
sl st – slip stitch
Marker (or a contrasting thread) is used only to mark the beginning of the round and will shift slightly during crocheting. Do not try to realign it.
HOW TO CROCHET A FREE ELEPHANT AMIGURUMI PATTERN
Arms (Make 2)
Stuff as you crochet, but not too firmly, so the base remains flat. You may also insert insoles made from firm material for extra stability. Do not stuff the upper section.
R1: 6 sc in MR (6)
R2: inc x 6 (12)
R3: (1 sc, inc) x 6 (18)
R4: (2 sc, inc) x 6 (24)
R5: (3 sc, inc) x 6 (30)
R6: BLO sc in each stitch around (30)
R7-R8: sc in each stitch around (30)
R9: (dec, 13 sc) x 2 (28)
R10-R11: sc in each stitch around (28)
R12: (dec, 12 sc) x 2 (26)
R13-R14: sc in each stitch around (26)
R15: (dec, 11 sc) x 2 (24)
R16-R17: sc in each stitch around (24)
R18: (dec, 10 sc) x 2 (22)
R19-R20: sc in each stitch around (22)
R21: (dec, 9 sc) x 2 (20)
R22-R23: sc in each stitch around (20)
R24: (dec, 8 sc) x 2 (18)
R25-R26: sc in each stitch around (18)
R27: (dec, 7 sc) x 2 (16)
R28-R31: sc in each stitch around (16)
R32: (dec, 6 sc) x 2 (14)
R33-R36: sc in each stitch around (14)
R37: (dec, 5 sc) x 2
Fasten off and cut the yarn. Fold the piece flat.
Return to the FLO from R5. Attach yarn and crochet crab stitch around.
Tail
Using 3 strands of yarn held together, ch 9 and tie a knot at the tip.
The designer attaches the tail while crocheting the body, but you may sew it on later and also create a belly indentation if desired.
Legs (Make 2)
Stuff firmly as you crochet so the toy can stand independently, but avoid overstretching the stitches.
R1: inc x 6 (12)
R2: (1 sc, inc) x 6 (18)
R3: (2 sc, inc) x 6 (24)
R4: (3 sc, inc) x 6 (30)
R5: (4 sc, inc) x 6 (36)
Cut an insole from firm material matching the size of the sole.
R6: BLO sc in each stitch around (36)
R7-R8: sc in each stitch around (36)
Insert the insole.
R9: (dec, 7 sc) x 4 (32)
R10-R11: sc in each stitch around (32)
R12: (dec, 6 sc) x 4 (28)
R13-R14: sc in each stitch around (28)
R15: (dec, 5 sc) x 4 (24)
R16-R21: sc in each stitch around (24)
R22: (3 sc, inc) x 6 (30)
R23-R24: sc in each stitch around (30)
R25: (4 sc, inc) x 6 (36)
R26-R27: sc in each stitch around (36)
R28: (5 sc, inc) x 6 (42)
R29-R30: sc in each stitch around (42)
R31: (6 sc, inc) x 6 (48)
R32-R33: sc in each stitch around (48)
R34: (7 sc, inc) x 6 (54)
R35: sc in each stitch around (54)
Fasten off and cut the yarn.
Return to the FLO from R5. Attach yarn and crochet crab stitch around.
Do not cut the yarn on the second leg. Continue directly with the body.
Body
Place the legs next to each other and join them by crocheting 12 sc between them. Place a marker to indicate the beginning of the round.
R1: 42 sc around first leg + 42 sc around second leg (84)
R2-R5: sc in each stitch around (84)
R6: (12 sc, dec) x 6 (78)
R7: sc in each stitch around (78)
R8: (11 sc, dec) x 6 (72)
R9: sc in each stitch around (72)
Insert the tail in this round, centered above the leg join.
R10: (10 sc, dec) x 6 (66)
R11: sc in each stitch around (66)
R12: (9 sc, dec) x 6 (60)
R13: (8 sc, dec) x 6 (54)
R14-R17: sc in each stitch around (54)
R18: (7 sc, dec) x 6 (48)
R19-R22: sc in each stitch around (48)
R23: (6 sc, dec) x 6 (42)
R24-R27: sc in each stitch around (42)
R28: (5 sc, dec) x 6 (36)
R29-R30: sc in each stitch around (36)
R31: sc in each stitch around (36)
Attach the folded arms in this round if desired. They may also be sewn on later.
R32-R33: sc in each stitch around (36)
Fasten off, leaving a long tail for sewing.
Trunk
Stuff as you crochet. Stuff the tip firmly, but the base only lightly.
R1: inc x 6 (12)
R2: (1 sc, inc) x 6 (18)
R3: BLO sc in each stitch around (18)
R4-R10: sc in each stitch around (18)
R11: (8 sc, inc) x 2 (20)
R12-R14: sc in each stitch around (20)
R15: (9 sc, inc) x 2 (22)
R16-R18: sc in each stitch around (22)
R19: (10 sc, inc) x 2 (24)
R20-R22: sc in each stitch around (24)
R23: (11 sc, inc) x 2 (26)
R24: sc in each stitch around (26)
R25: (12 sc, inc) x 2 (28)
R26: sc in each stitch around (28)
R27: (6 sc, inc) x 4 (32)
R28: sc in each stitch around (32)
R29: (7 sc, inc) x 4 (36)
R30: sc in each stitch around (36)
Return to the FLO from R2. Attach yarn and crochet crab stitch around.
Head
The head is worked from the bottom upward. The trunk is joined during crocheting. Finish at the crown.
Stuff moderately as you go.
R1: inc x 6 (12)
R2: (1 sc, inc) x 6 (18)
R3: (2 sc, inc) x 6 (24)
R4: (3 sc, inc) x 6 (30)
R5: BLO (4 sc, inc) x 6 (36)
R6: (5 sc, inc) x 6 (42)
R7: (6 sc, inc) x 6 (48)
R8: (7 sc, inc) x 6 (54)
R9: (8 sc, inc) x 6 (60)
R10: (9 sc, inc) x 6 (66)
R11: (10 sc, inc) x 6 (72)
R12-R21: sc in each stitch around (72)
R22: Attach the trunk across 12 stitches, crocheting trunk and head stitches together (72)
R23: sc around the full opening (84)
R24-R25: sc in each stitch around (84)
R26: (11 sc, dec) x 6 (72)
R27: sc in each stitch around (72)
R28: (10 sc, dec) x 6 (66)
R29: sc in each stitch around (66)
R30: (9 sc, dec) x 6 (60)
R31: sc in each stitch around (60)
R32: (8 sc, dec) x 6 (54)
R33: sc in each stitch around (54)
R34: (7 sc, dec) x 6 (48)
R35: (6 sc, dec) x 6 (42)
R36: (5 sc, dec) x 6 (36)
R37: (4 sc, dec) x 6 (30)
R38: (3 sc, dec) x 6 (24)
R39: (2 sc, dec) x 6 (18)
R40: (1 sc, dec) x 6 (12)
R41: dec x 6
Close the opening and weave in the end.
Lip
R1: inc x 6 (12)
R2: (1 sc, inc) x 6 (18)
R3: (2 sc, inc) x 6 (24)
R4-R5: sc in each stitch around (24)
Fold in half and join edges with sc.
Leave a tail for sewing.
The designer noted that this lip turned out quite large. For a smaller version, omit either R3 or R4.
Head Shaping
Sew the lip underneath the trunk, leaving 3–4 rounds between the lip and the ridge.
Mark sculpting points with pins.
Points 1–4 are at the mouth corners.
Points 5–6 are one eye position, 6 rounds above trunk attachment (head R28).
Points 7–8 mirror the second eye.
Distance between each paired point should be 1 sc.
For the first eye, insert the needle at point 1 and bring it out at point 5. Thread the eye, insert at point 6, exit at point 2, tighten, knot, and hide ends.
Repeat symmetrically for the second eye using points 4, 8, 7, and 3.
Assembly
Sew the head to the body using the ridge as a guide.
Join all 36 stitches of head R5 to all 36 stitches of body R33.
Fasten off and weave in ends.
Ears
No exact ear pattern was provided.
You may use any doily-style motif.
Edge with crab stitch, fold in half, and secure the base with approximately 6–7 sc.
Position on the head as desired and sew in place.
Decorative flowers may be added to cover the ear seams.
Your elephant is ready!
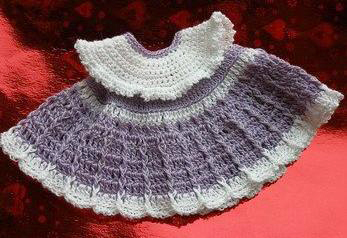
DRESS
This decorative sundress is designed for dolls and teddy bears. It fits teddy bears from approximately 13 cm tall as well as small dolls. If crocheted with very fine iris cotton and a 0.75 mm hook, the dress will be miniature in size. When made with standard cotton yarn, it will fit toys around 20 cm tall. The design works best with three colors, such as white, lilac, and pink.
Materials
• Yarn
‣ White cotton yarn
‣ Lilac cotton yarn
‣ Pink cotton yarn
• Crochet hook (appropriate for your yarn)
• Yarn needle
• Scissors
Abbreviations
ch – chain
sc – single crochet
dc – double crochet
sl st – slip stitch
inc – increase
FPdc – front post double crochet
BPdc – back post double crochet
FPsc – front post single crochet
Instructions
Using white yarn:
R1: Ch 38, (5 sc, inc) x 5, sc in remaining 6 chains (42)
R2: Ch 1, inc, 7 sc, inc, 6 sc, inc, 10 sc, inc, 6 sc, inc, 7 sc, inc (48)
R3: Ch 1, (9 sc, inc) x 2, 8 sc, (inc, 9 sc) x 2 (52)
R4: Ch 1, 6 sc, inc, (7 sc, inc) x 5, 5 sc (58)
R5: Ch 1, 6 sc, inc, (8 sc, inc) x 5, 6 sc (64)
R6: Ch 1, (15 sc, inc) x 4 (68)
R7: Ch 1, 6 sc, inc, (8 sc, inc) x 6, 6 sc, inc (76)
R8: Work in FLO only. Change to lilac yarn. Join with sl st in first stitch, ch 3, 2 dc in starting area, dc in next stitch, (inc dc, dc) x 5, ch 10, skip 16 stitches, continue in 17th stitch, (inc dc, dc) x 10, ch 10, skip 16 stitches, (inc dc, dc) x 6 (88 total stitches including chains)
R9: Ch 3, dc in each stitch around (86)
R10: Work in FLO only. Change to white yarn. Ch 3, dc in each stitch around (87)
R11: Join lilac yarn with sl st. Ch 3, dc in same stitch, FPdc, (inc dc, dc, FPdc) x 28, dc in final stitch (116)
R12: Ch 3, (BPdc, 3 dc) x 28, BPdc, dc in final 2 stitches
The BPdc stitches should align directly beneath the FPdc stitches from the previous round to maintain the pattern.
Join the skirt edges with sl st to close the dress. The dress can be worn over the head or pulled up from the feet.
Turn the work.
R13: Ch 3, dc, FPdc, (3 dc, FPdc) x 28, dc in final stitch, join
R14-R18: Ch 3, dc, FPdc, (3 dc, FPdc) x 28, dc, join
R19: Join white yarn with sl st. Ch 3, dc in same stitch, dc in next stitch, FPdc, (dc, inc dc, dc, FPdc) x 28, dc, join
R20: Work in BLO only. Join pink yarn. (Ch 1, dc) x 2, ch 1, [(ch 1, sc) x 4, ch 1, FPsc], repeat 27 times, ch 1, sc, ch 1, join
Optional: Add one extra white round with increases to create fuller ruffles (for example, 2 dc in each stitch).

Yoke
Using white yarn:
R1: Attach yarn to R7, 2 sc, (inc, 5 sc) x 12, inc (91)
Do not turn. Fasten off and weave in ends.
R2: Work in BLO only. Join pink yarn with sc, (ch 1, sc) x 2, [ch 1, FPsc, skip 1 stitch, (ch 1, 3 sc) x 3], repeat 16 times, ch 1, FPsc, (ch 1, sc) x 2
Fasten off and secure.
Optional: Add another white ruffle round with increases if desired.
Copyright & Credits
This pattern is designed by Ekaterina Mizinova. Please do not copy, redistribute, or republish this pattern without permission. You may sell finished items made from this pattern, but please credit the original designer when sharing your work.

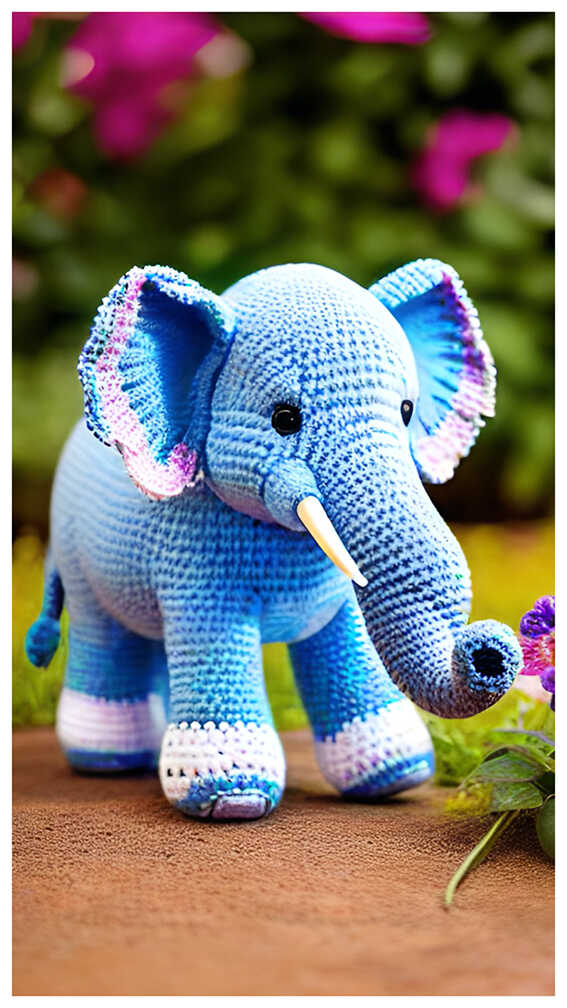
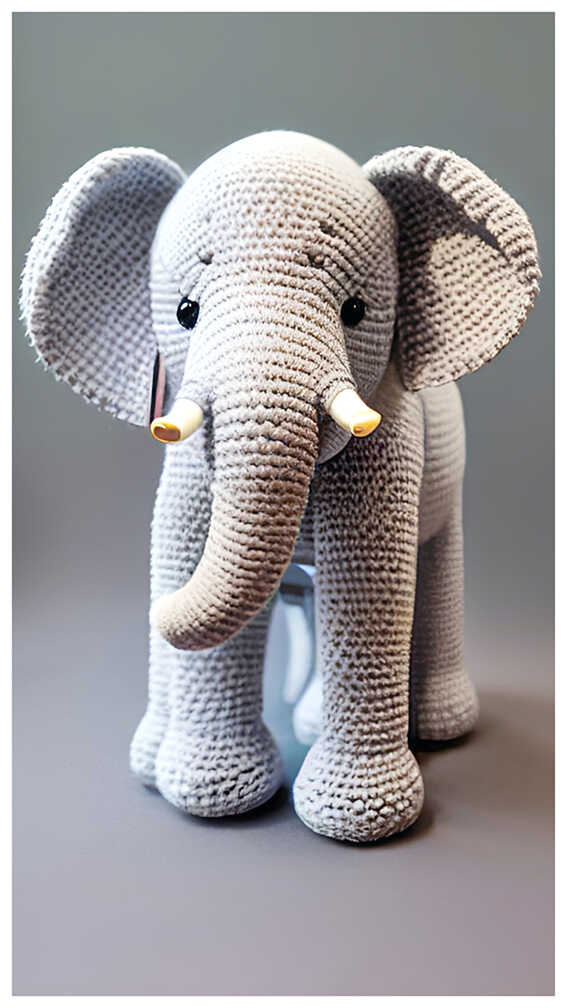
Elegant and meaningful to gift, this elephant amigurumi is a beautiful handmade gift idea for safari nursery decor, baby showers, or collectors who love detailed crochet animals. If inspiring handmade animal ideas are your favorite, these elephant amigurumi picks are worth exploring.
Elephant Gift Ideas for Safari Nursery Decor