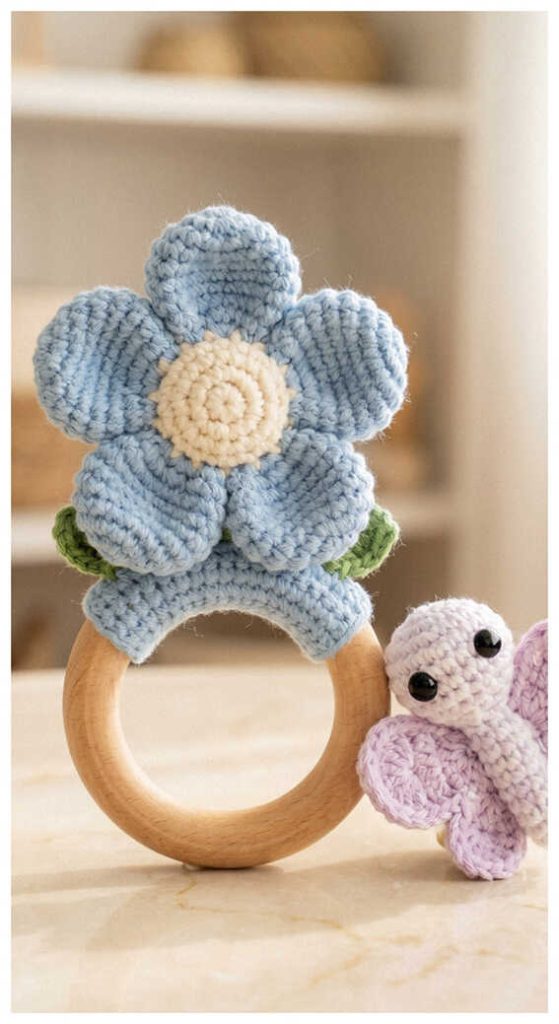
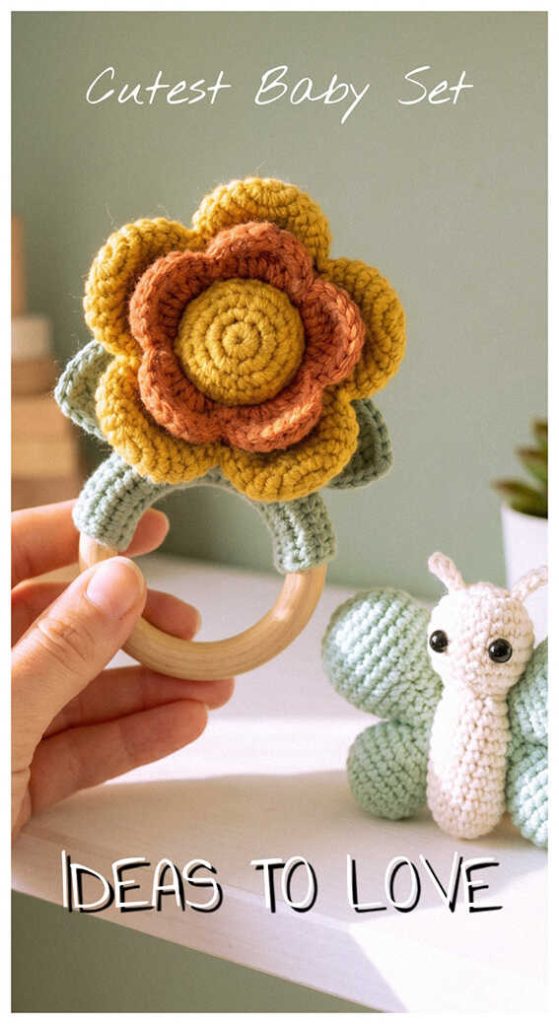
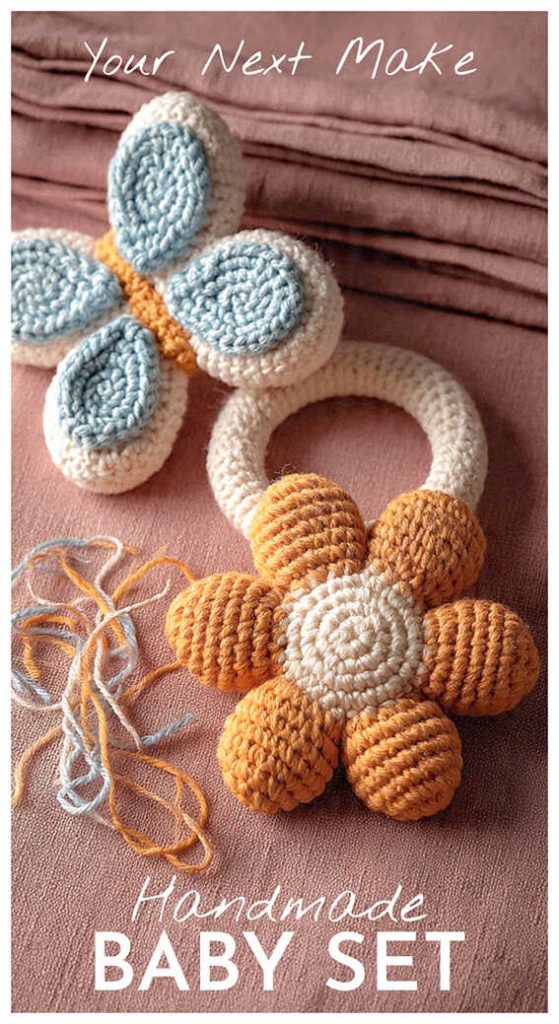
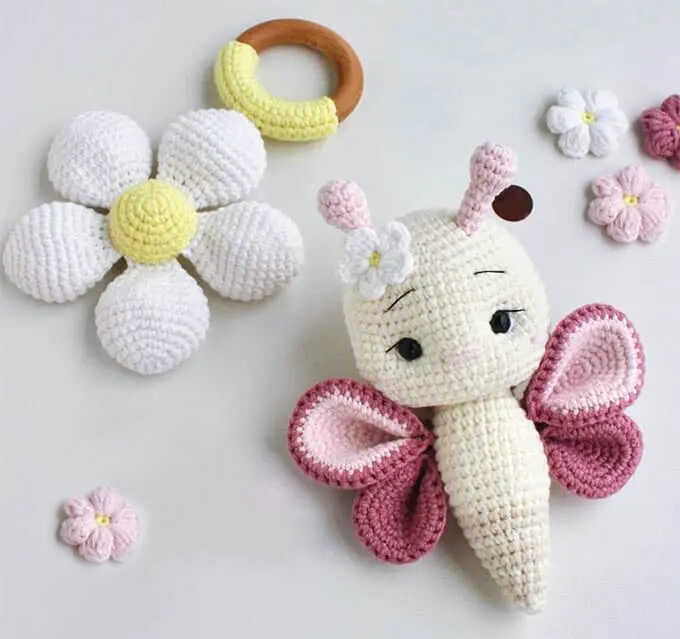
Butterfly and Flower Rattle Amigurumi Set Free Pattern
Designer: Steshka Toys
Instagram: @steshka.toys
Difficulty Level: Intermediate
A Sweet Baby Crochet Project Filled with Handmade Charm.
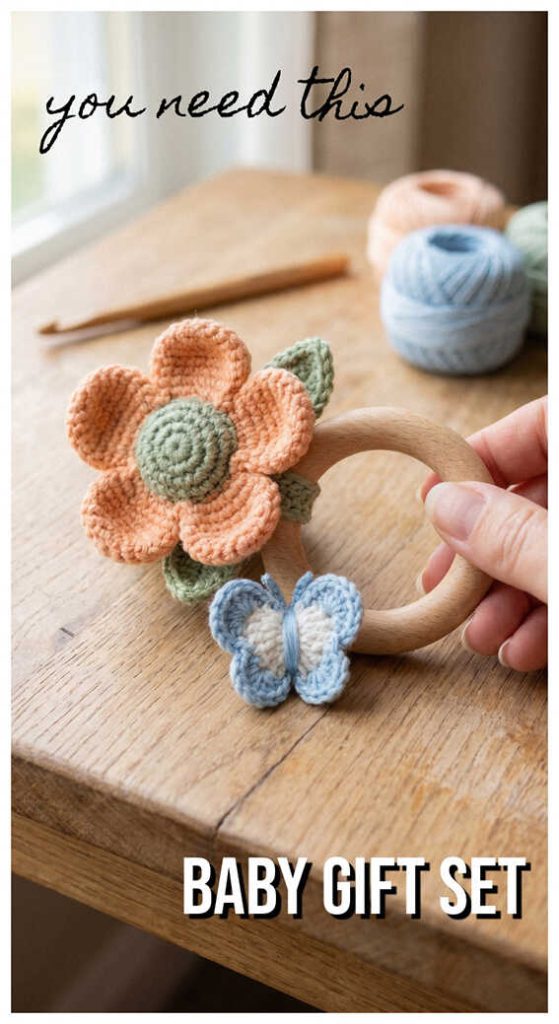
Baby-friendly crochet projects are always special, and this butterfly and flower rattle amigurumi pattern is a delightful choice. Designed by Daria @steshka.toys, this colorful handmade gift idea combines a cheerful butterfly with a charming flower rattle, making it perfect for nursery decor or baby playtime. We sincerely thank Daria for sharing this creative design.
This intermediate amigurumi pattern includes multiple pieces, decorative details, and assembly work that create a polished finished result. If you enjoy playful baby-themed projects, you might also love the adorable bee amigurumi featured on one of our other crochet blogs.
Made with cotton-blend yarn for excellent stitch definition, this project creates a beautiful keepsake with both decorative and playful appeal. If you enjoy colorful crochet creations, the sweet ladybug amigurumi is another charming design featured on one of our other crochet blogs. More related butterfly amigurumi ideas are waiting at the end of the pattern.
Materials
Butterfly
• Yarn
▪︎ YarnArt Jeans 03
▪︎ YarnArt Jeans 05
▪︎ YarnArt Jeans 65
▪︎ YarnArt Jeans 74
▪︎ YarnArt Jeans 01
▪︎ YarnArt Jeans 67
• 2 mm crochet hook
• 8 mm safety eyes
• Toy stuffing
• Stitch markers
• Pins
• Thin black thread for eyelashes and eyebrows
• Thin white thread for eye highlights
• Sewing needle
• Scissors
Flower Rattle
• Yarn
▪︎ YarnArt Jeans 01
▪︎ YarnArt Jeans 67
• 2 mm crochet hook
• Toy stuffing
• Stitch markers
• Pins
• Roasting bag sleeve
• 24 mm rattle insert
• 55 mm beech wooden ring
• Sewing needle
• Scissors
Abbreviations
MR – magic ring
sl st – slip stitch
ch – chain
sc – single crochet
dc – double crochet
inc – increase
dec – decrease
(…) x n – repeat the instructions in parentheses n times
HOW TO CROCHET A BUTTERFLY AND FLOWER RATTLE
Head and Body
R1: 6 sc in MR (6)
R2: inc x 6 (12)
R3: (1 sc, inc) x 6 (18)
R4: (2 sc, inc) x 6 (24)
R5: (3 sc, inc) x 6 (30)
R6: (4 sc, inc) x 6 (36)
R7: (5 sc, inc) x 6 (42)
R8: (6 sc, inc) x 6 (48)
R9: (7 sc, inc) x 6 (54)
R10-R14: 54 sc
R15: 10 sc, ch 1, working into the second chain from the hook: 10 sc, ch 1, working into the second chain from the hook: 32 sc (54)
R16-R19: 54 sc
Insert the eyes into the openings formed by the chains in R15.
Stuff as you work.
R20: (7 sc, dec) x 6 (48)
R21: (6 sc, dec) x 6 (42)
R22: (5 sc, dec) x 6 (36)
R23: (4 sc, dec) x 6 (30)
R24: (3 sc, dec) x 6 (24)
R25: (2 sc, dec) x 6 (18)
Continue with the body:
R26: 18 sc
R27: (2 sc, inc) x 6 (24)
R28-R29: 24 sc
R30: (3 sc, inc) x 6 (30)
R31-R35: 30 sc
R36: (3 sc, dec) x 6 (24)
Change color.
R37-R38: 24 sc
Change color.
R39: (2 sc, dec) x 6 (18)
Change color.
R40-R41: 18 sc
Change color.
R42: (1 sc, dec) x 6 (12)
Change color.
R43-R44: 12 sc
Change color.
R45: 6 dec (6)
R46: 6 sc
Close the opening and hide the yarn tail.
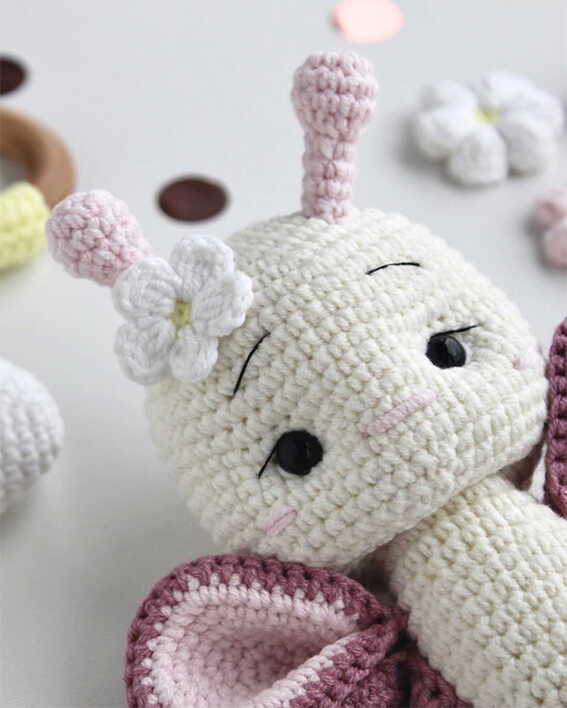
Shape the face with sculpting.
Embroider the eye highlights, eyelashes, eyebrows, nose, and cheeks.
Antennae (Make 2)
R1: 6 sc in MR (6)
R2: inc x 6 (12)
R3-R4: 12 sc
R5: 6 dec (6)
R6-R9: 6 sc
Leave a long tail for sewing.
Sew the antennae between R5 and R8 of the head, spacing them 8–9 stitches apart.
Large Wings (Make 4)
Small Piece (Make 2)
R1: 6 sc in MR (6)
R2: inc x 6 (12)
R3: (1 sc, inc) x 6 (18)
R4: (2 sc, inc) x 6 (24)
R5: (3 sc, inc) x 6 (30)
R6: (4 sc, inc) x 6 (36)
R7: (5 sc, inc) x 6 (42), sl st
Large Piece (Make 2)
Work the same as the small piece.
Do not cut the yarn.
Place the large piece over the small piece and crochet through both pieces together: 42 sc.
Fold the wing and sew one end closed with 6 stitches through both layers.
Small Wings (Make 4)
Small Piece (Make 2)
R1: 6 sc in MR (6)
R2: inc x 6 (12)
R3: (1 sc, inc) x 6 (18)
R4: (2 sc, inc) x 6 (24)
R5: (3 sc, inc) x 6 (30), sl st
Large Piece (Make 2)
Work the same as the small piece.
Do not cut the yarn.
Place the large piece over the small piece and crochet through both pieces together: 30 sc.
Fold the wing and sew one end closed with 4 stitches through both layers.
Sew the large wings between R29 and R30, spacing them 9 stitches apart.
Sew the small wings between R30 and R31, spacing them 11 stitches apart.
Flower for the Butterfly’s Head
R1: 5 sc in MR
Change color.
R2: (ch 3, 3 dc, ch 3, sl st) x 5
Fasten off.
Sew the flower next to one antenna.
Flower Rattle
Petals (Make 5)
R1: 5 sc in MR (5)
R2: inc x 5 (10)
R3: (1 sc, inc) x 5 (15)
R4: (2 sc, inc) x 5 (20)
R5: (3 sc, inc) x 5 (25)
R6: (4 sc, inc) x 5 (30)
R7-R9: 30 sc
R10: (4 sc, dec) x 5 (25)
R11: (3 sc, dec) x 5 (20)
R12: (2 sc, dec) x 5 (15)
R13: (1 sc, dec) x 5 (10)
Cut the roasting bag sleeve into small squares and crumple them.
Stuff each petal with the crinkle material.
Fold the petal in half and crochet through both layers with 5 sc.
Flower Center
R1: 5 sc in MR (5)
R2: inc x 5 (10)
R3: (1 sc, inc) x 5 (15)
R4: (2 sc, inc) x 5 (20)
R5: (3 sc, inc) x 5 (25)
R6: 25 sc
Attach the petals during R7.
R7: 25 sc
Insert the rattle.
R8: (3 sc, dec) x 5 (20)
R9: (2 sc, dec) x 5 (15)
R10: (1 sc, dec) x 5 (10)
R11: 5 dec (5)
Close the opening and hide the yarn tail.
Ring Cover
Ch 20
Starting in the second chain from the hook:
R1-R8: 19 sc
Work in turning rows. At the end of each row, make 1 turning chain.
Leave a long tail for sewing.
Wrap the cover around the wooden ring and sew it closed.
Sew the flower to the cover through one petal.
Your Butterfly and Flower Rattle are complete!
Copyright & Credits
This pattern is designed by Daria (@steshka.toys). Please do not copy, redistribute, or republish this pattern without permission. You may sell finished toys made from this pattern, but please credit the designer by tagging @steshka.toys when sharing your work.
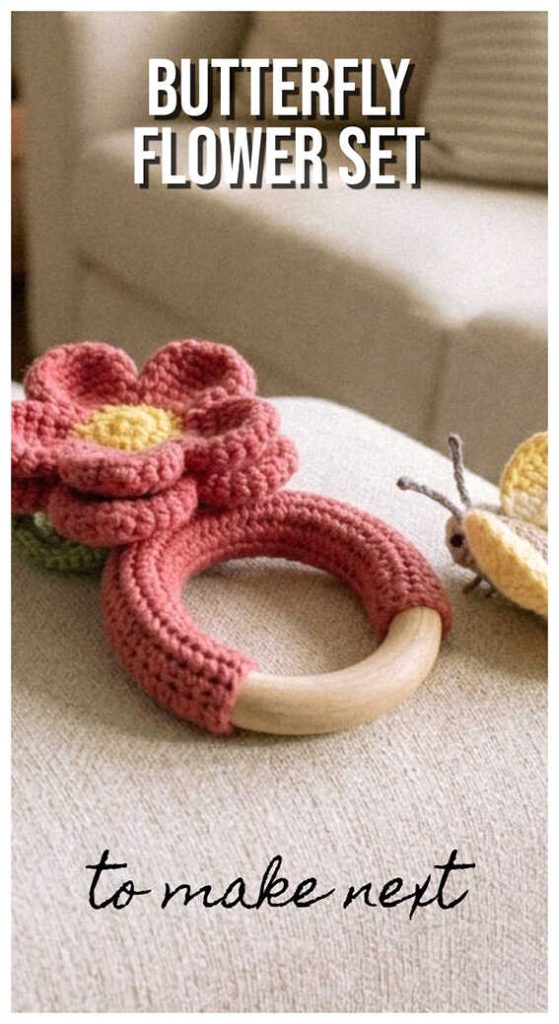
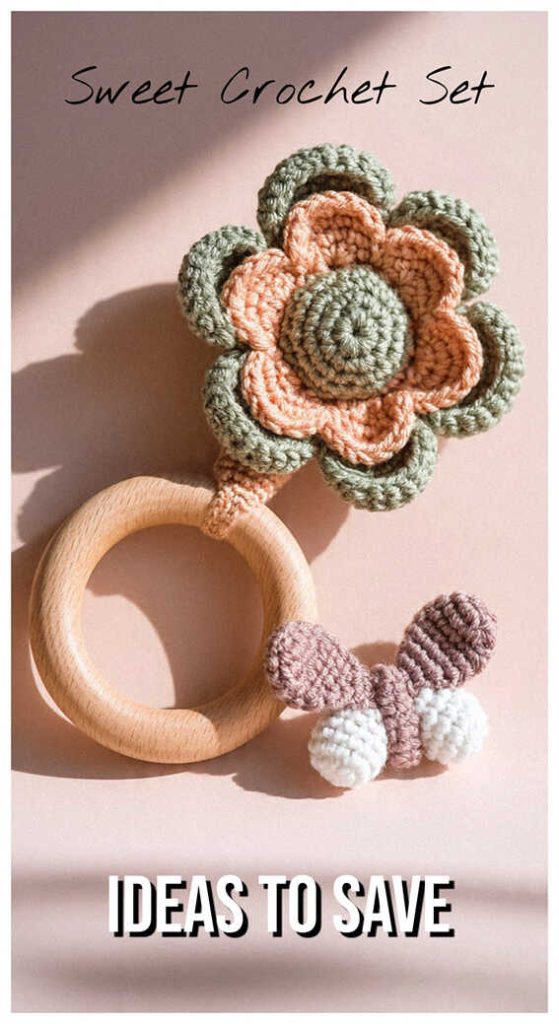
A butterfly and flower rattle set makes a thoughtful handmade gift idea for baby showers, new parents, and nursery decor lovers. The soft floral theme and gentle colors are a big part of why people love this adorable crochet set.
Butterfly and Flower Rattle Ideas for Sweet Baby Gifts